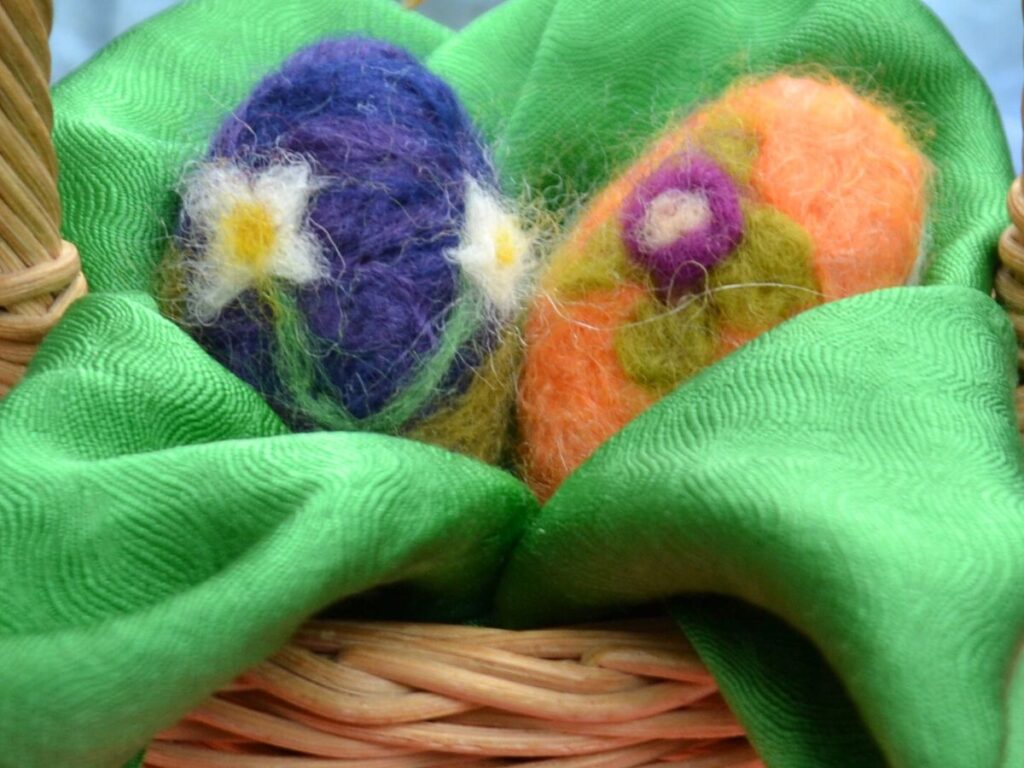
Easter egg needle felting tutorial for beginners
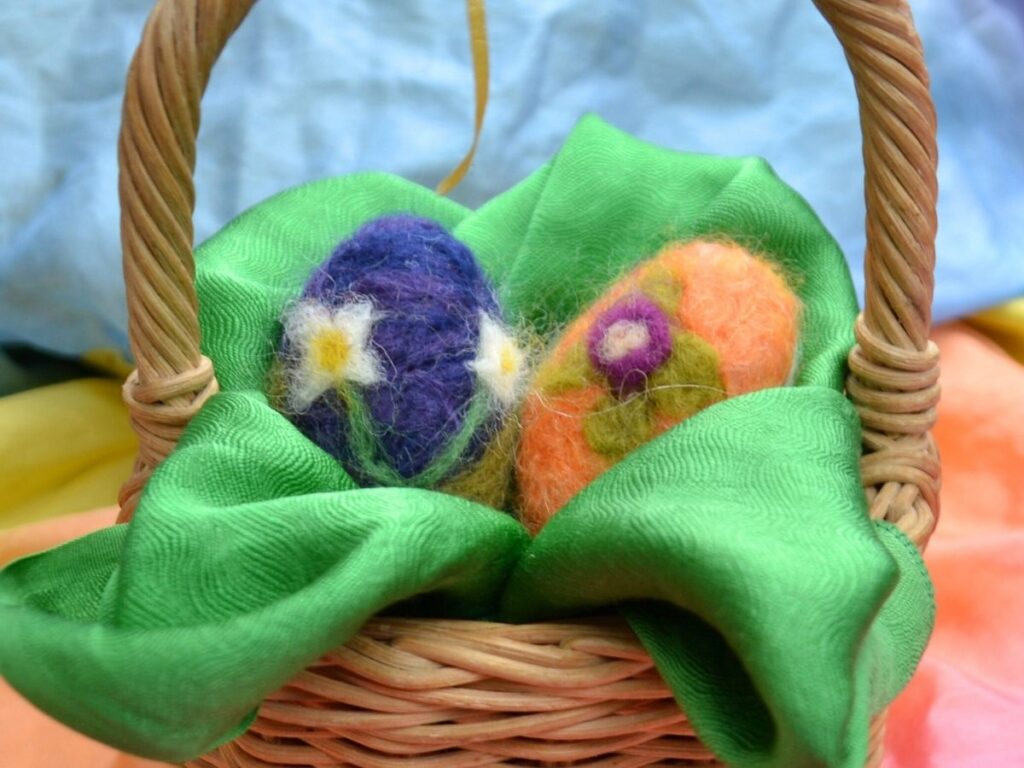
Spring is the perfect time to bring a little handmade beauty into your home, and these needle-felted Easter eggs are a lovely project for beginners who want to try this relaxing craft. Using just a few simple materials—soft wool roving, a felting needle, and a foam pad—you can transform plain wool into colourful, textured eggs that make charming decorations for an Easter basket, seasonal nature tables, or thoughtful handmade gifts. In this beginner-friendly tutorial, you’ll learn the basic needle-felting techniques step by step, so even if you’ve never tried felting before, you’ll be able to create sweet little eggs full of springtime character.
Needle felting:
Felting needles are designed with small barbs along their shafts. As you repeatedly poke the wool, these barbs grab and push the fibres inward, causing them to tangle and compact. This process of fibre interlocking transforms loose wool into a dense, solid shape.
Insert the needle vertically, moving it straight up and down into the wool. Avoid poking at an angle, as this can cause the needle to break. Refrain from twisting or forcing the needle—use gentle, repeated motions instead. Pay special attention not to hurt yourself with the needle!
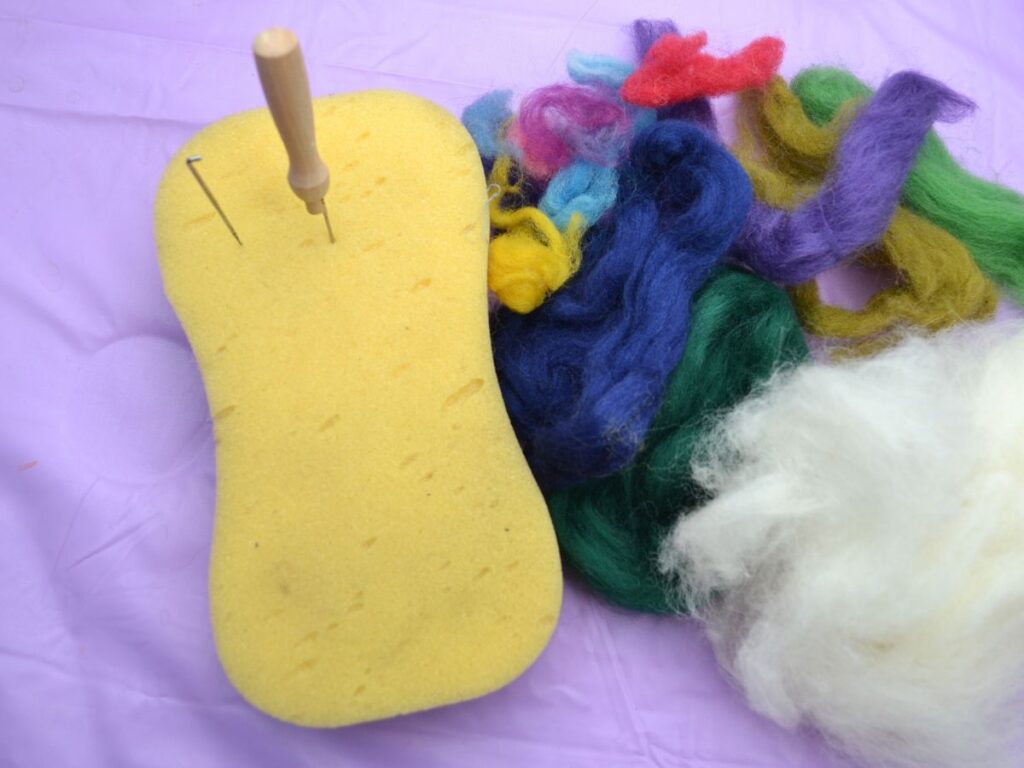
What you need:
- Wool roving
- Felting needles
- Felting pad or a big sponge
Wool:
Any carded wool roving will work for these felted eggs. I am using the wool that I have for stuffing dolls and toys to start the egg, and then wrapping other colours on top, but you can start with the colour of wool you want.
Felting needles:
In felting, needle sizes are measured in gauges, describing both their thickness and their best use in the felting process. The higher the gauge, the finer the needle.
What the Numbers Mean
- Lower gauge (e.g., 32–36) → thicker needle.
- Higher gauge (e.g., 40–42) → thinner needle.
The 38 Gauge (Medium) would be a good beginner needle, good for general shaping and attaching parts.
Reference Table
| Gauge | Thickness | Best Use |
|---|---|---|
| 32 | Very thick | Large core, fast felting |
| 36 | Thick | Core shaping |
| 38 | Medium | General shaping |
| 40 | Thin | Detail & smoothing |
| 42 | Very thin | Final finish |
How to make the needle felted easter egg:
Materials:
- Wool roving of different colours.
- Felting needles, a medium one (Gauge: 36-38) to shape the egg, and a thin one (Gauge: 40) to decorate the egg.
- A felting pad or sponge.

Start by wraping some wool around two fingers.
Then wrap more wool around it and start poking with the felting needle to felt the wool. Keep rotating the ball of wool, so you felt it evenly.

Once the ball of wool starts to harden, wrap more wool and felt until tight.
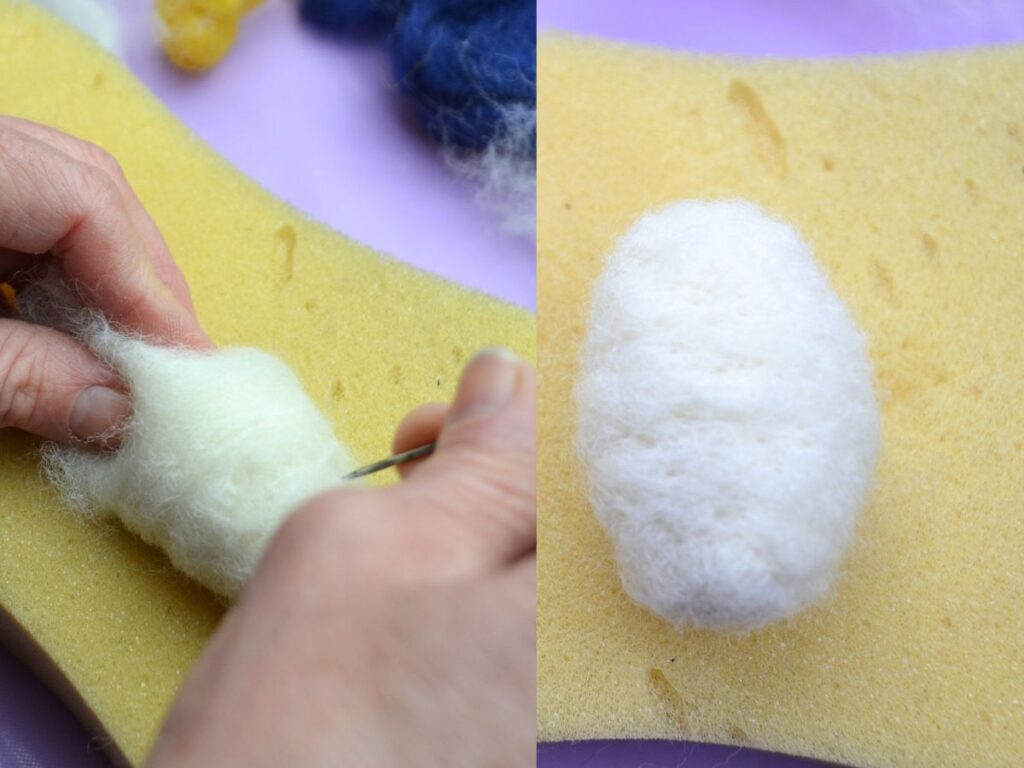
Shape the ball into an egg by working the top and bottom.
(You shape it by needle felting more in the parts you need to reduce)
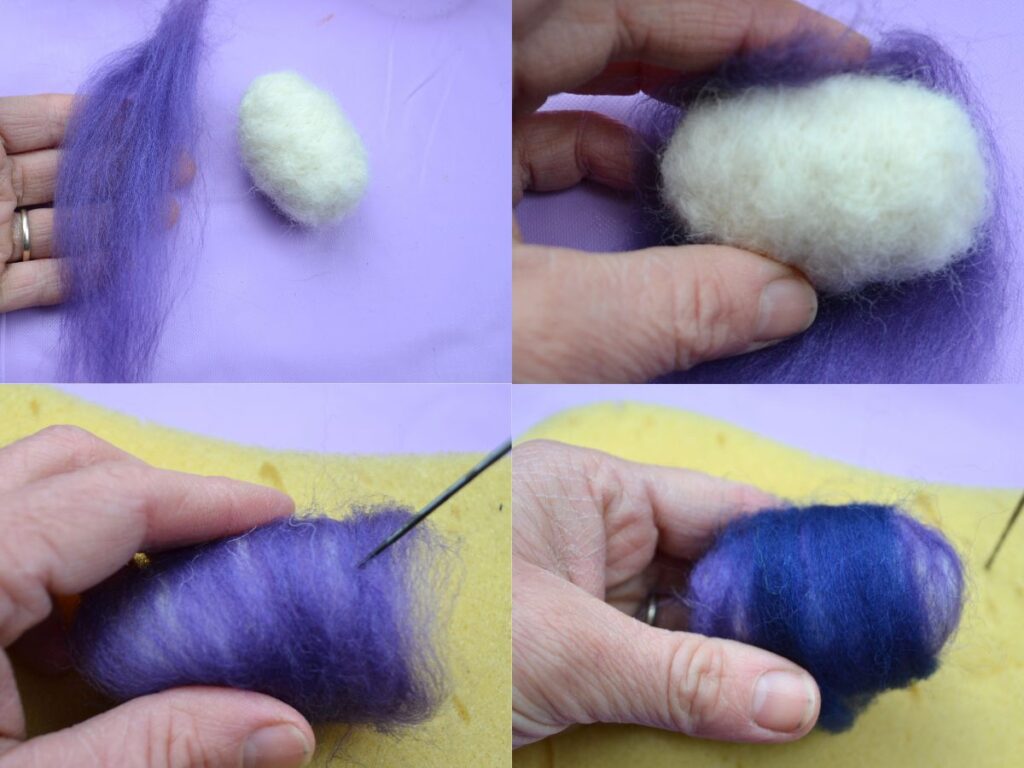
Once you happy with your eggs shape and size,if you want, you can wrap coloured wool around it.
Needle felted to attach.

Wrap in different directions, and mix colours if you like.
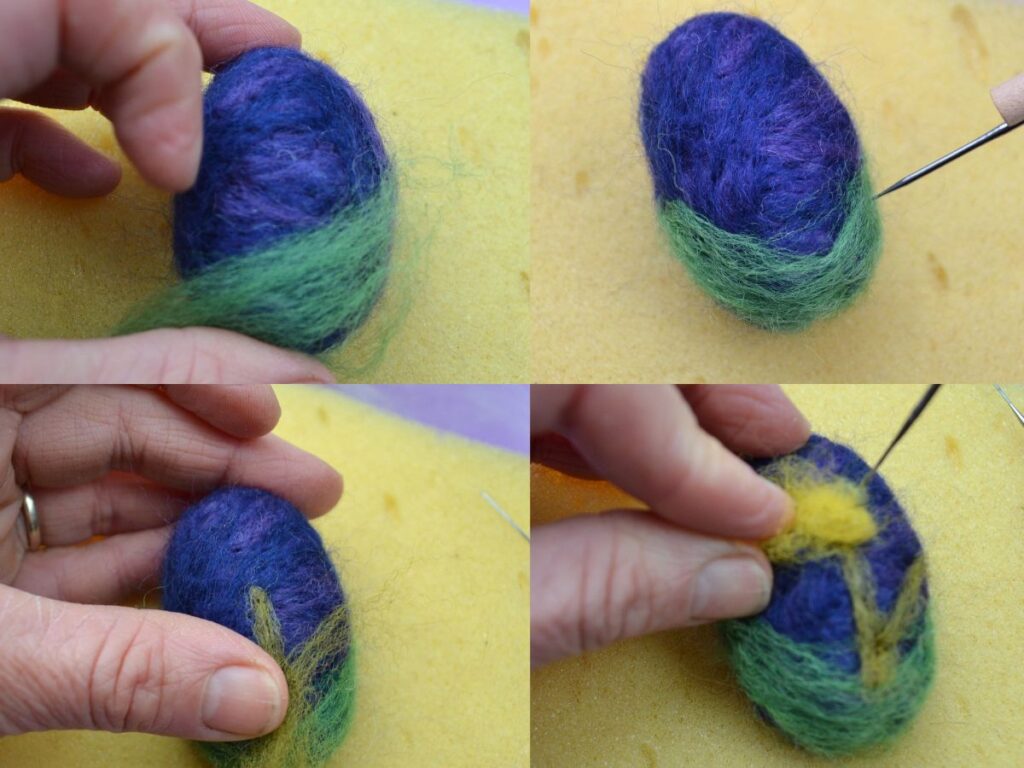
Now you can decorate your egg.
If you have a thinner felting needle, it is easier to work with at this point; otherwise, use the medium felting needle.
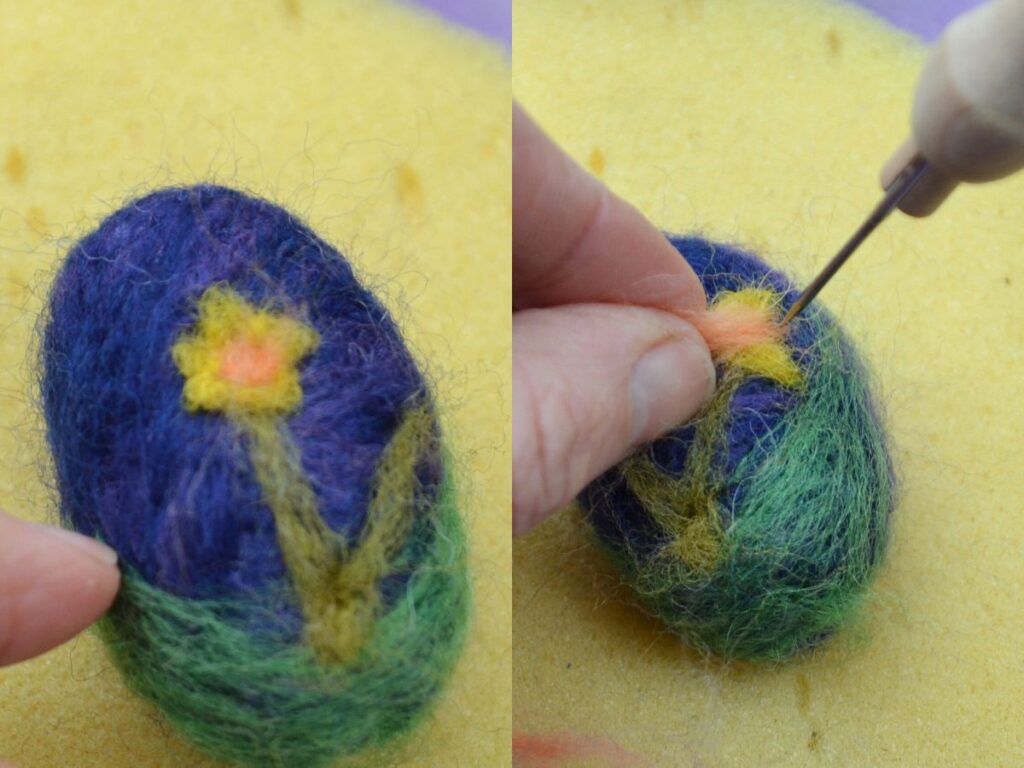
You only need small pieces of wool for the decorations. Shape the decorations with the felting needle, and if, for some reason, you don’t like the decoration or part of it, you can gently pull it off and start again.
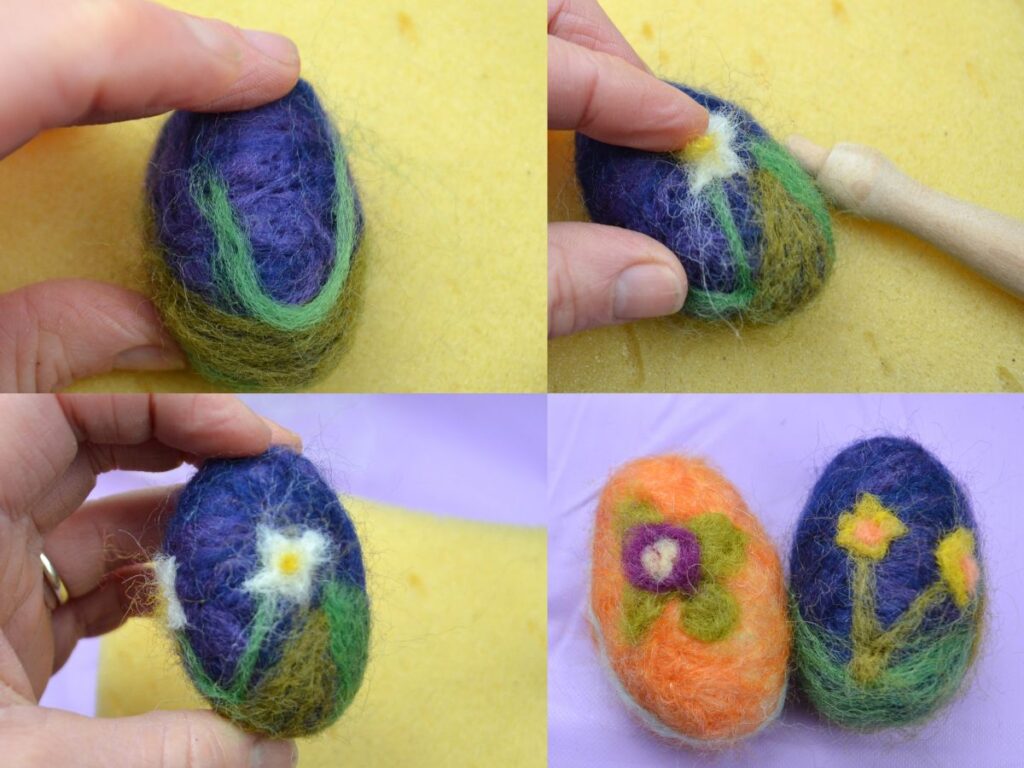
I hope this post was useful and you enjoy making needle-felting eggs this easter!
Other posts and felting tutorials: