Easy wet felting craft project ideas for children
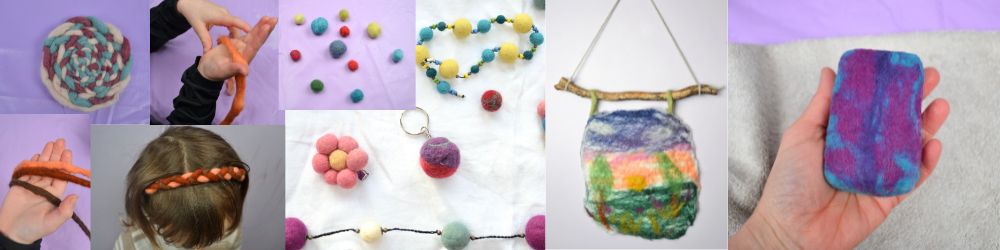
Easy ideas for a wet felting project to make with children in the winter months.
These wet-felting ideas are fun projects for children to do using the wet-felting method.
Wet felting is a lovely activity that even younger children can participate in.
Children love wet felting, and it is a great sensory activity. There are so many creative ideas you can make with it.
In this blog post, I put together four wet felting project ideas that are easy enough for children of all ages. And the winter months are a perfect time to work with wool.
The process of wet felting involves binding wool fibres with soapy water, creating friction between the soap bubbles and your hands.
Materials for all projects :
For all the projects, you will need roving wool and warm water with soap (I use grated natural soap) to make soapy water.
If the water gets cold, add some hot water to keep it warm.
Wet felted strands:
Carded Wool (washed and brushed) felting is created from rubbing the wet wool between the hands, which is a very soothing and rewarding experience for children.
You can create many different creations with your children. You can make wool snakes, and if braided, headbands and trivets.
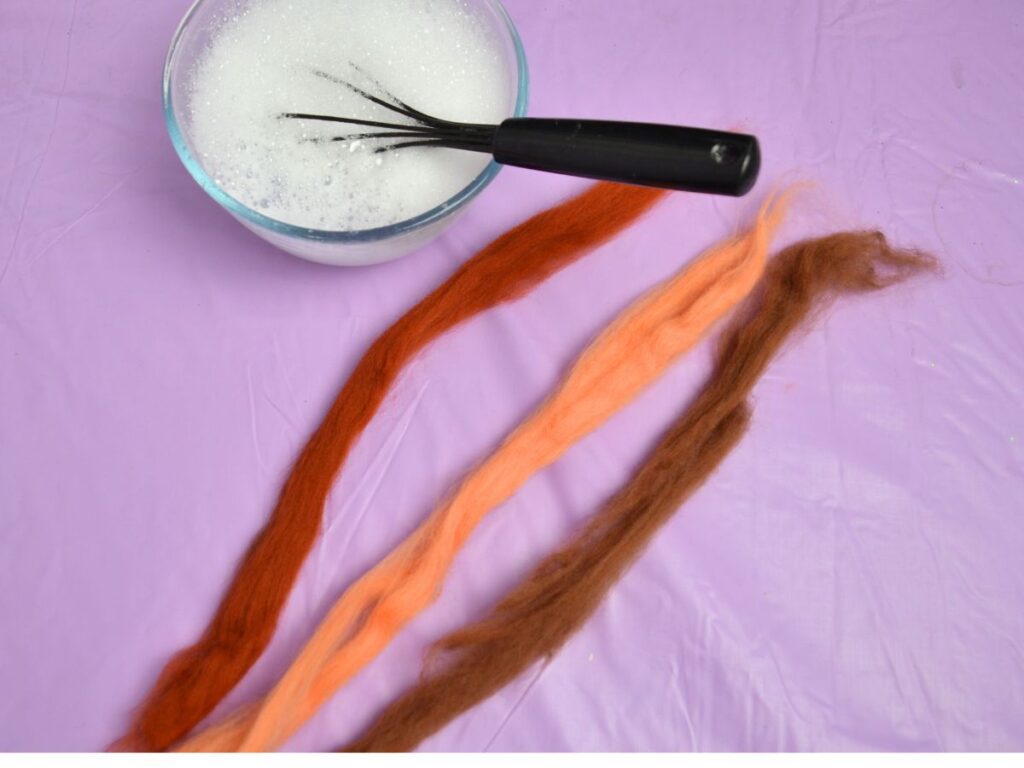
Step 1:
Pull long strips of felt.
Depending on what you want to make, use three strips of wool for a braid, or, if you’re going to make a snake, make the strip thicker.
Step 2:
Mix the grated soap in warm water until you get loads of soap suds.


Step 3:
Put some soap suds on the wool strip until it is fully covered.
Step 4:
Then start rubbing the wet wool strip between your hands. Gently at first, and then increase.
If your child finds it difficult, they can rub it on an old towel from time to time.


Let them dry.


You can braid the wool and sew an elastic to make a headband.
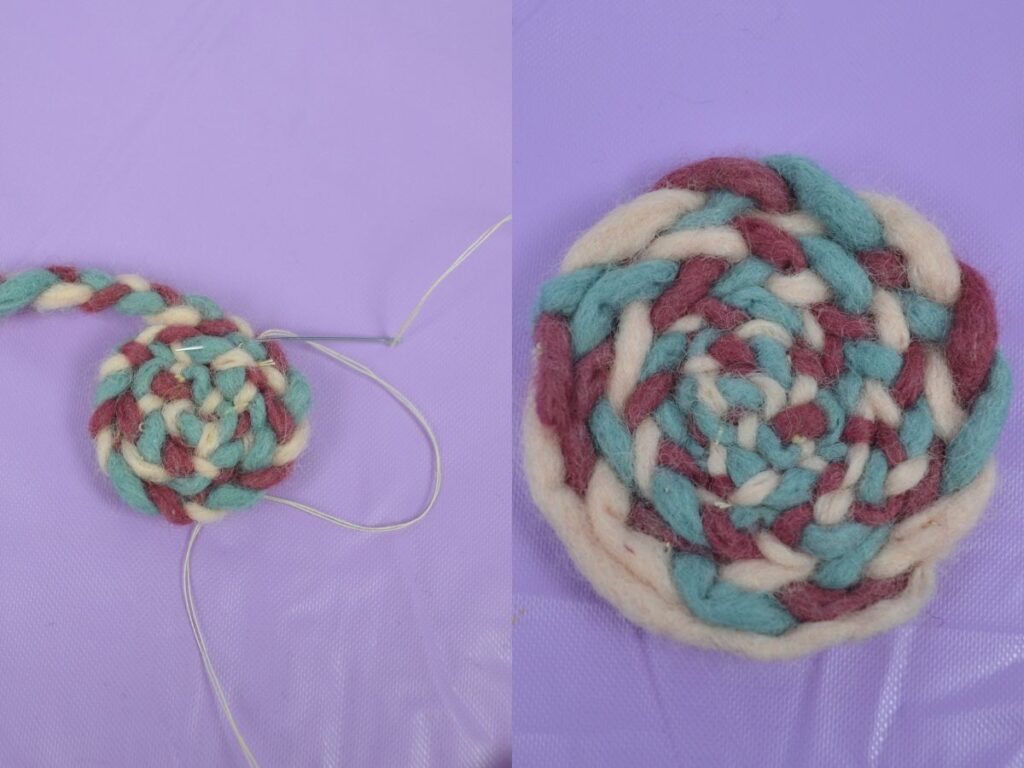
You can also sew the braids in a spiral shape to make a lovely felt braided roving trivet (place mat).

They can also make their own felt Snake.
Wet felted wall hanging:
You will need:
- wool roving,
- Soap
- warm water
- bubble wrap (optional)
- An old towel (optional)
- Strong string (optional)

Step 1:
The first layer of wool is in the downward direction until you reach the size of the piece you want, and the next layer is in an across direction. Repeat these two steps to achieve at least four layers of wool.
Step 2:
Now you can start making your picture.
For the sky, my 8-year-old son put blue, purple, rosie pink and orange wool. Then, he made the green grass, and on top, he made the trees, the sun, and some flowers.


Step 3:
Once your picture is finished, mix the soap and warm water to make lots of suds, grab some, and splash them over the felt picture. Cover most of the picture with the suds, and then cover with bubble wrap.
Step 4:
Press the bubble wrap gently, then apply very light pressure, and start the felting process by rubbing with your finger in circular motions. Do this gently so the image does not move.


Step 5:
After a short while, lift the bubble wrap to check the image and check whether any parts need more soap suds; then smooth the edges.
Then cover it and continue felting until you can pinch the felt; if no fibres come out, it should be ready.
This takes time, so take turns with your child.
To speed the process, wrap the bubble wrap around a pool noodle, then wrap the old towel around the pool noodle. With the palms of your hands or your forearms, apply gentle pressure and roll your pool noodle the length of your hands or forearms.
For more instructions on how to work with the pool noodle, please take a look at my wet felting tutorial.


Lovely 🥰

Felted balls:

Materials:
Roving wool, warm water in a bowl, a whisk and soap.
Step 1:
Whisk to get lots of suds.


Step 2:
Make a ball with a piece of wool.
Use the soap suds to soak the ball-shaped piece of wool with the bubbles.
Step 3:
Then, roll the ball between your hands. Apply very gentle pressure until the ball begins to take shape; once the felt ball hardens, you can apply more pressure. Keep adding bubbles to your ball as needed.


Step 4:
Let the felt balls dry.
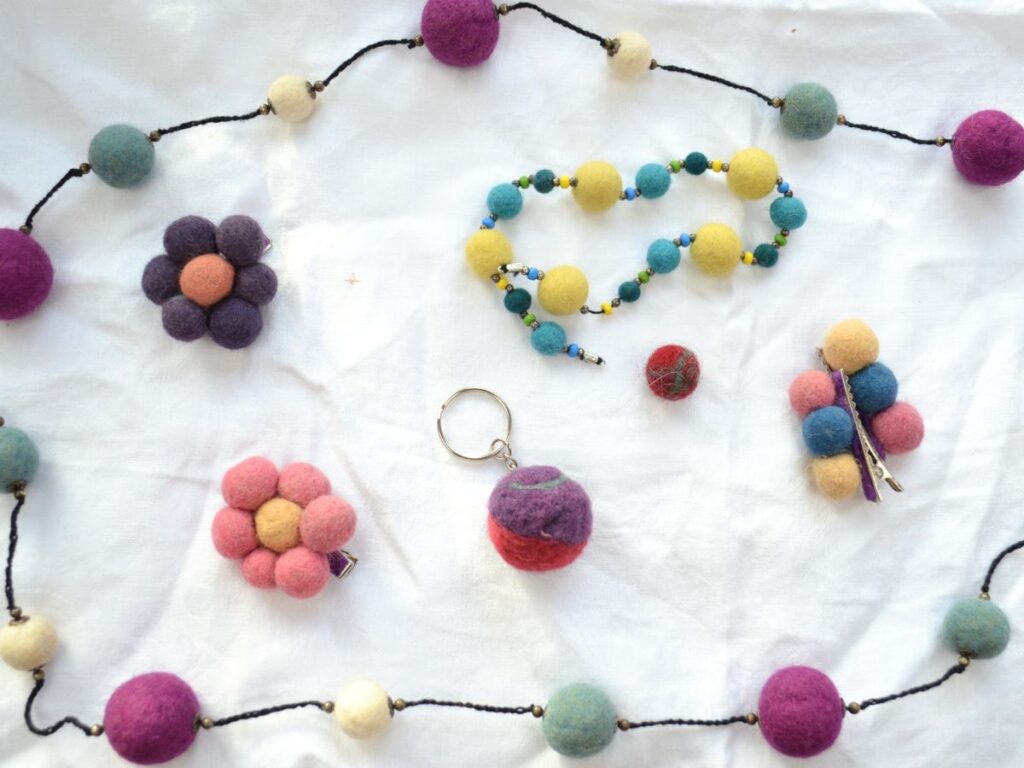
You can use these felt balls for many different creations.
There are so many things you can make with the felt balls your child makes!
You or an older child can make a necklace, bracelet, hair clips, or even a keychain!
Felt soap:

Materials:
To make a felt soap, you only need a bar of soap, roving wool and a bowl of warm water.
Step 1:
Pull thin pieces of wool in any colours you want to make a larger shape than the soap. Wet the soap with warm water and set it on the wool.
Wrap the soap with the wool; because the soap is wet, the wool will adhere to it. Cover with more wool if there are patches without wool.


Step 2:
You can add more layers of different colours. Wrap them in the other direction as shown in the pictures. Wet your hands if needed to help the wool adhere.
Step 3:
Start rubbing the soap very slowly and gently. It takes time, but slowly it will start to felt.
And as the wool starts to felt, you can increase the pressure and speed.


Step 4:
At this point, you can give it to younger children to rub.
Step 5:
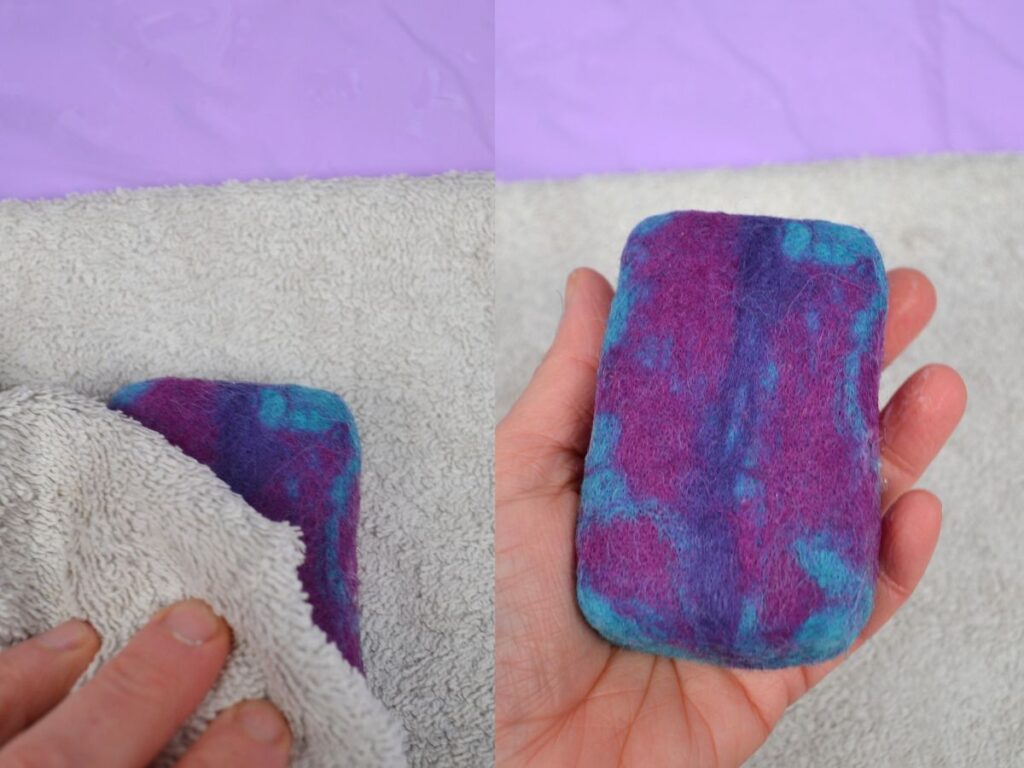
When it feels ready, rinse it in cold water and gently dry it with a towel or paper towel.
The felt soap will continue to felt with use.
Beyond being lovely for your home, this felt soap can be a beautiful gift you and your child can make for someone.
You can buy natural dyes Wool and more at myriad or the world of wool
Any suggestions are welcome; please let me know how your projects turned out in the comments below.