Needle felting for beginners: Easy felt ball project
Crafting a needle-felted ball is an ideal introductory project for beginners. With roving wool and a felting needle, you shape the loose fibres into a ball and repeatedly poke it, causing the fibres to mesh together and form a sturdy, smooth sphere. Mastering this fundamental shape helps you become comfortable with the tools and techniques, and it also serves as the starting point for a variety of handmade toys and decorative creations.
There are two ways to felt wool: wet felting and needle felting.
Needle felting is a dry felting method that tangles the wool fibers together. Using special barbed needles, needle felting allows you to sculpt wool fibres into solid shapes without water.
Felting needles are designed with small barbs along their shafts. As you repeatedly poke the wool, these barbs grab and push the fibres inward, causing them to tangle and compact. This process of fibre interlocking transforms loose wool into a dense, solid shape.
Felting Needles:
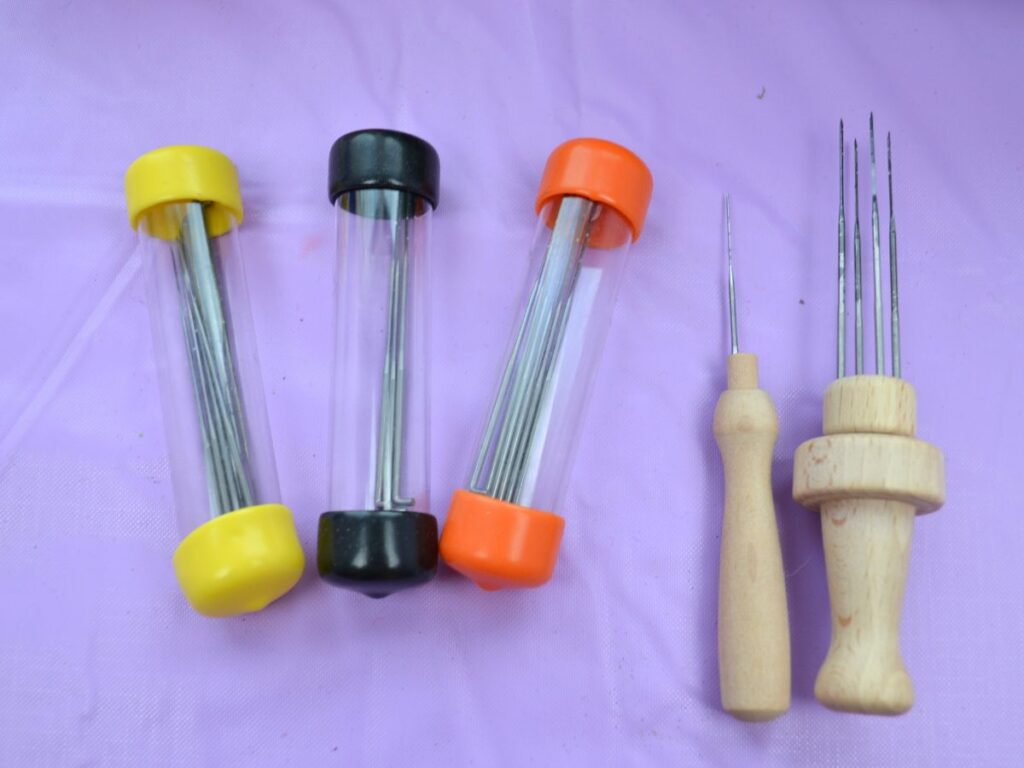
In felting, needle sizes are measured in gauges, describing both their thickness and their best use in the felting process. The higher the gauge, the finer the needle.
What the Numbers Mean
- Lower gauge (e.g., 32–36) → thicker needle, larger barbs, felts fast
- Higher gauge (e.g., 40–42) → thinner needle, smaller barbs, felts
The 38 Gauge (Medium) would be a good beginner needle, good for general shaping and attaching parts.
Reference Table
| Gauge | Thickness | Best Use |
|---|---|---|
| 32 | Very thick | Large core, fast felting |
| 36 | Thick | Core shaping |
| 38 | Medium | General shaping |
| 40 | Thin | Detail & smoothing |
| 42 | Very thin | Final finish |
Gauge indicates needle thickness, but the shape determines how quickly and efficiently you can felt.
- Triangle (3 barbs): Classic, versatile, and offers good control
- Star (4 barbs): Works faster than triangle needles
- Spiral/Twisted: Felts wool quickly and leaves a smoother finish
- Crown: Barbs are only at the tip, making it perfect for surface detailing
You can buy needles and wool in places like World of Wool, Myriad, or even Amazon. have different sizes.
Wool:
Micron count is the fibre thickness (lower = softer, finer)
So, very fine wool, like merino wool (sheep breeds), would be 18–24 microns, best for a smooth surface finish
Medium-fine wool like Corriedale Wool is 25–30 microns, for General sculpting
Coarser fibres like Romney Wool 27-34 microns are best for Hairy textures
Core Wool, usually a blend of coarse wools, would be for the inner structure (Not meant to be visible)
Depending on your skill level, you can start with easy needle felting projects featuring simple shapes, such as rounded forms.
A felt ball can be a first project, as it is easy and a great way to practice using the needles.
How to make a neddle felting ball:
A needle felt ball is an excellent toy for babies and toddlers. ( as long as it is big enough for the child not to swallow!)
I like that it is a quiet toy made with all-natural materials, and that the softness of felt can be comforting to hold. It is a very versatile, simple, handmade toy.
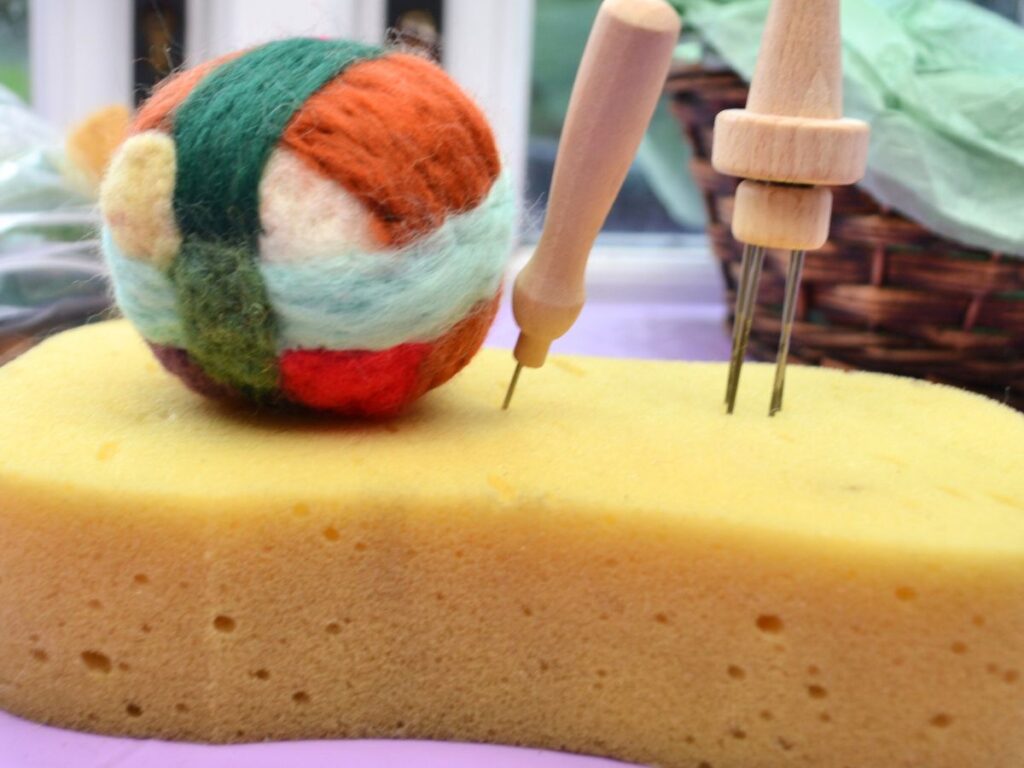
For the ball, start with a coarse/medium felting needle. You can also get a felting multi-needle tool that will help make the felt ball more quickly, but I find it easier, and you have more control to work with just one, even if it takes longer. You can work on this project over a few days.
To start needle felting, you’re going to need:
- Felting needles.
- A felting pad (you can use a foam pad like a car sponge as a pad)
- Felting wool,like wool roving. I would start with core wool, then move to Corriedale wool.
This is how I make needle felt balls, so use it as a guide to try, but feel free to make and decorate your felt ball however you like.
Step 1:
The easiest way to start the felt ball is to get enough wool, about the size of a golf ball.
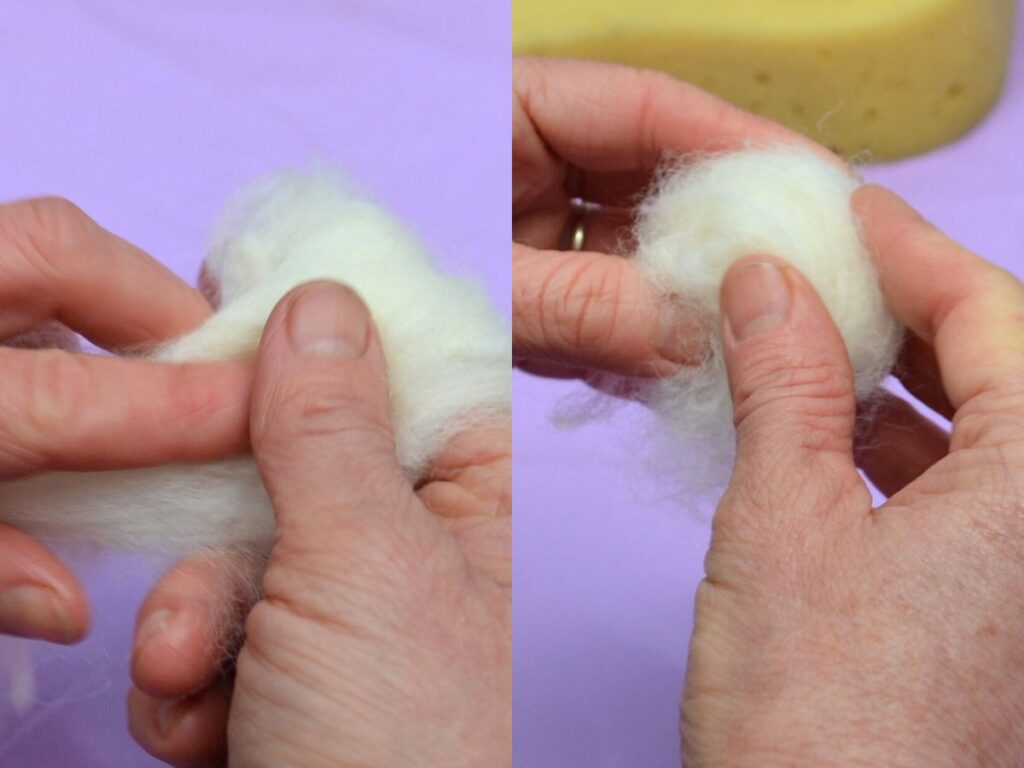
Place the wool around your index finger and wrap it tightly, then take it off your finger. Shape it a bit into a ball and place it on a felting mat.
Step 2:
Gently start poking the wool and shaping the ball. Once shaped, keep poking it to harden the ball before adding more wool.
Insert the needle vertically, moving it straight up and down into the wool. Avoid poking at an angle, as this can cause the needle to break. Refrain from twisting or forcing the needle—use gentle, repeated motions instead. Pay special attention not to hurt yourself with the needle! You can get finger guards if you prefer.
Step 3:
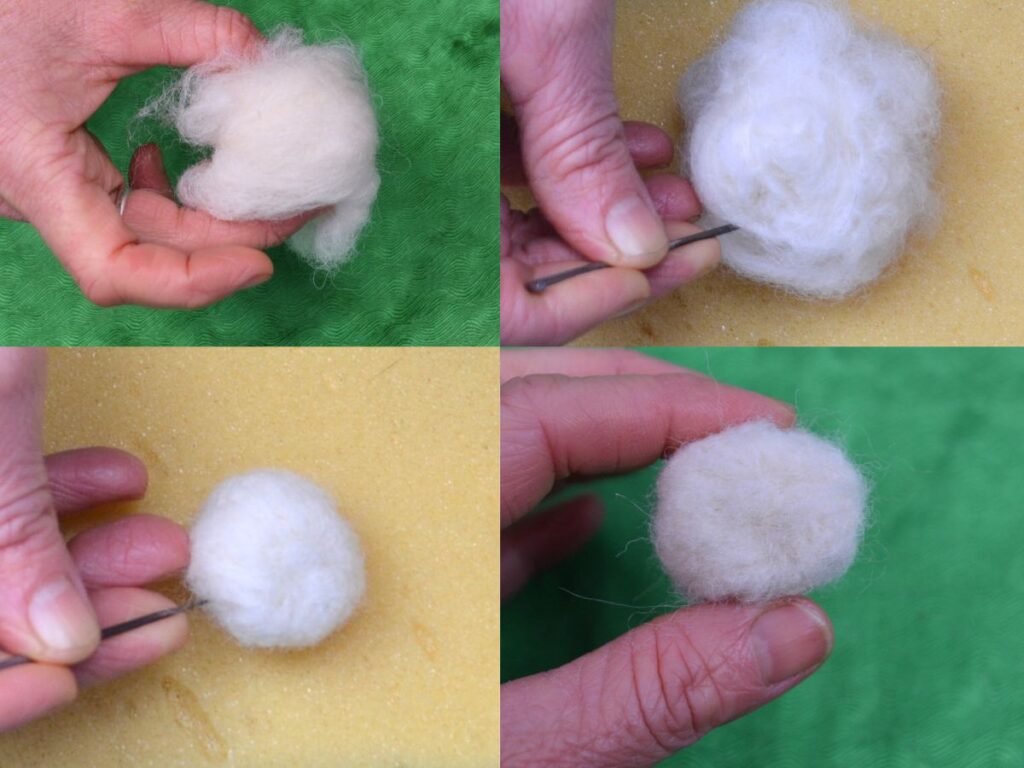
When it starts to harden, add a little more wool and wrap the ball with the new layer.
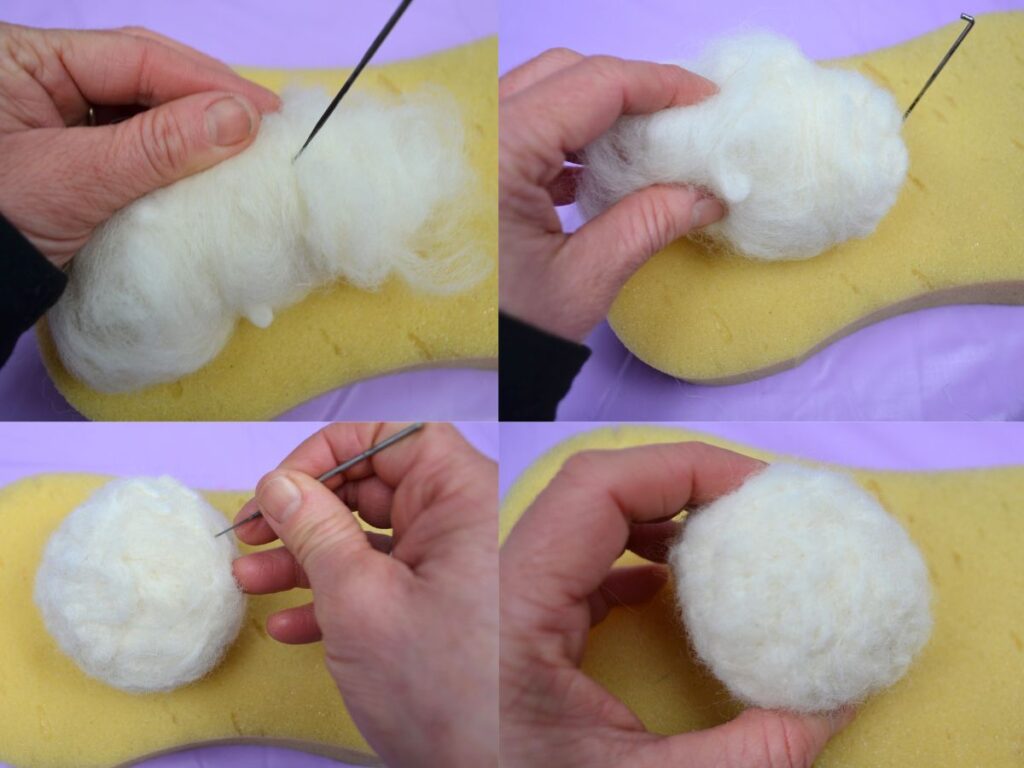
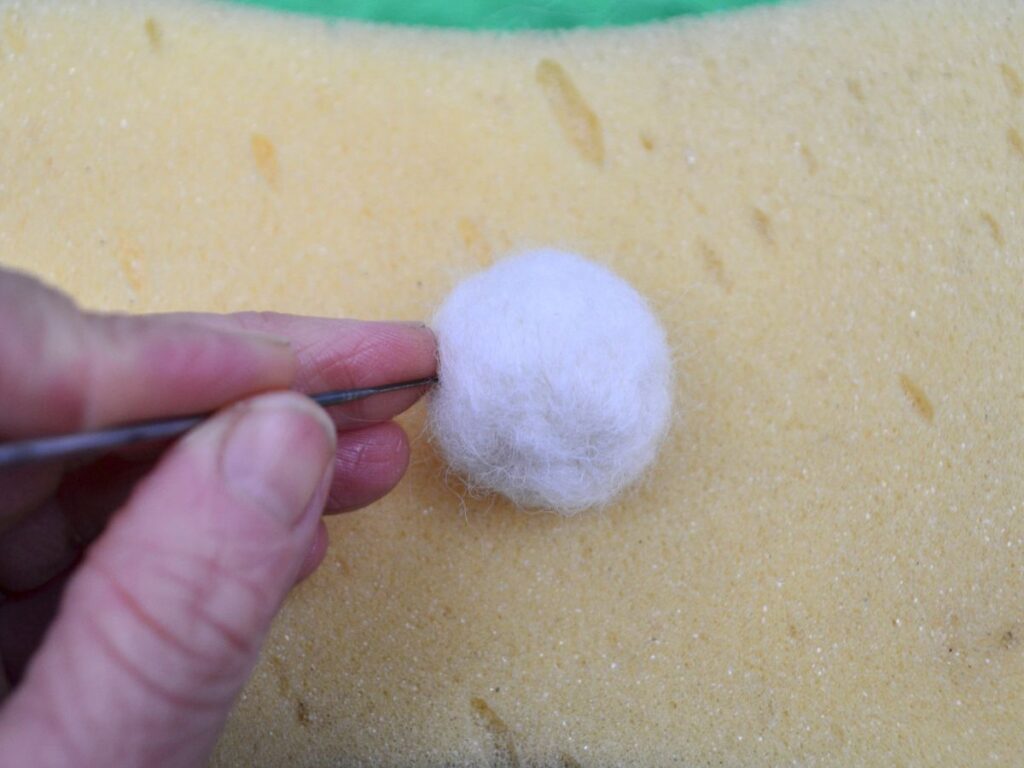
Start poking it in the middle, then move to one side and then the other.
Feel the ball for any soft or out-of-shape areas, then poke your needle, focusing on those areas.

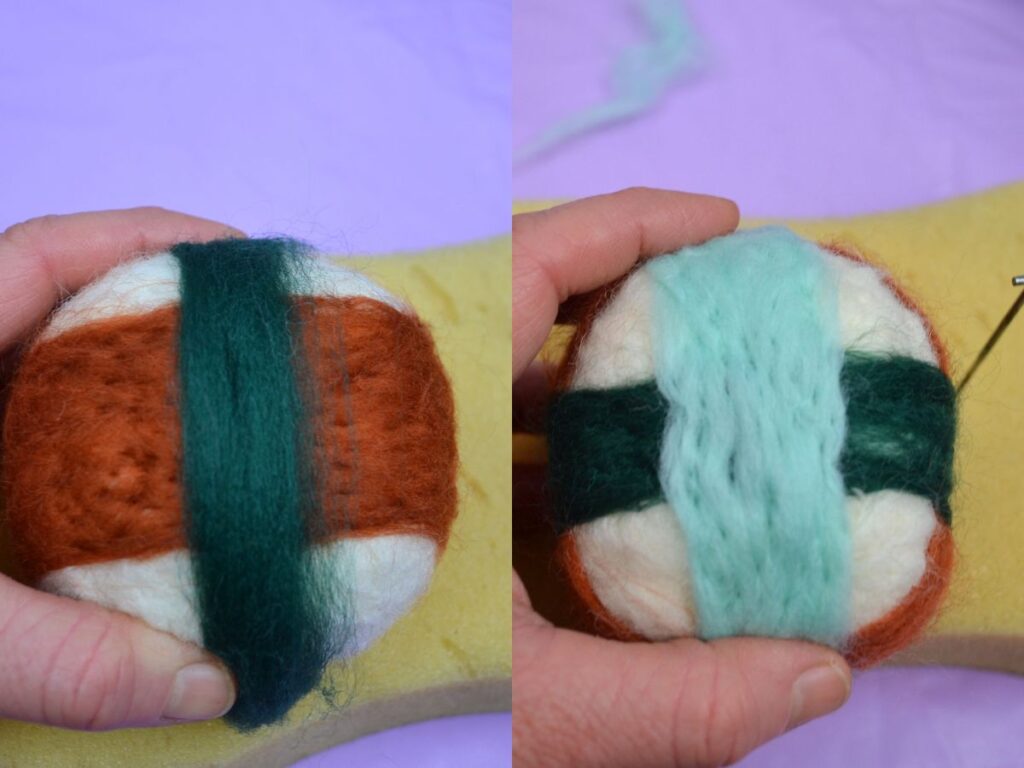
Step 4:
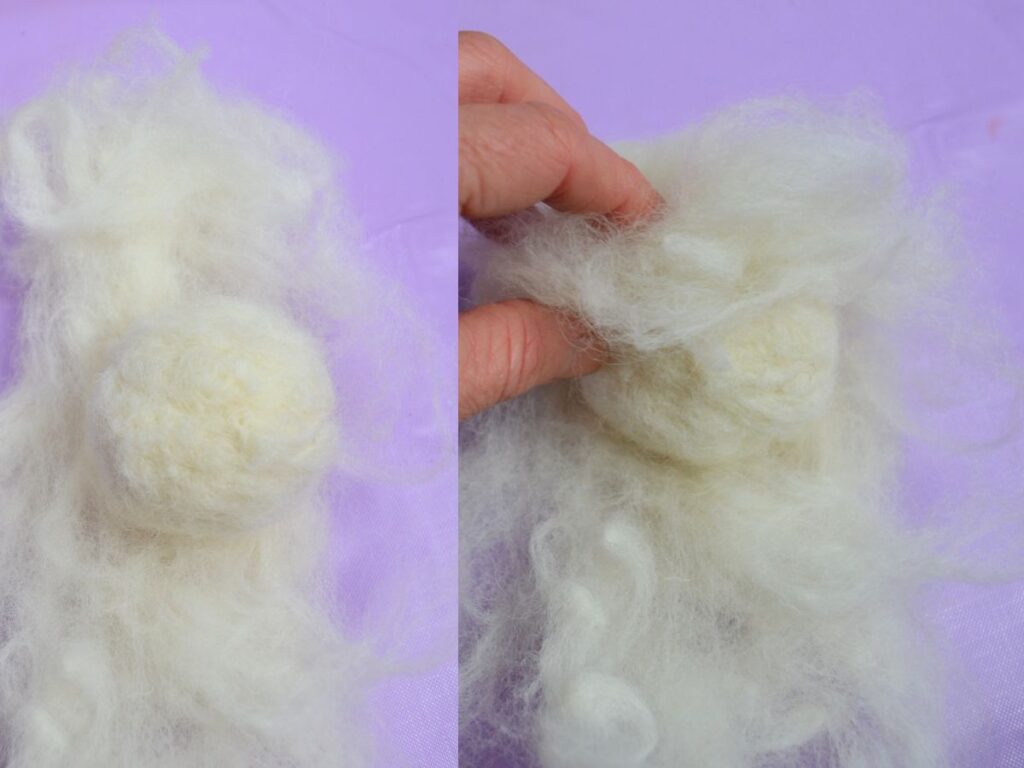
As the ball gets bigger, when you wrap the wool, it might not cover the entire ball, so wrap the wool in one direction and then in the next, wrap it in the other direction.

Keep going until your felted ball has the desired shape and size.

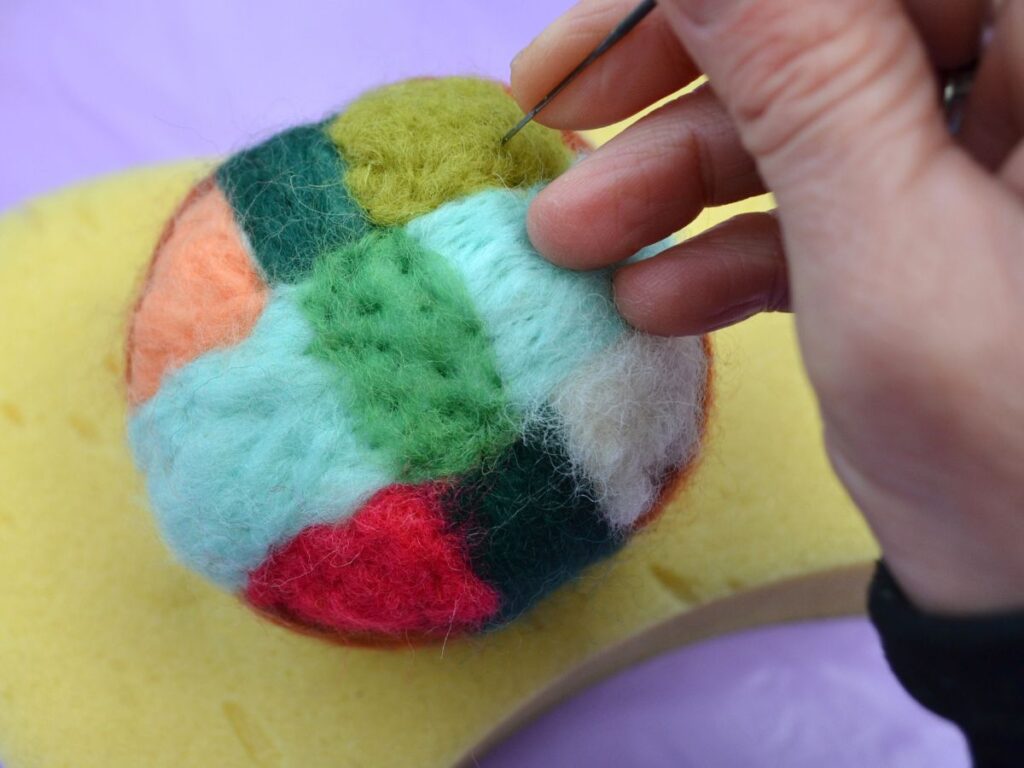
Step 5:
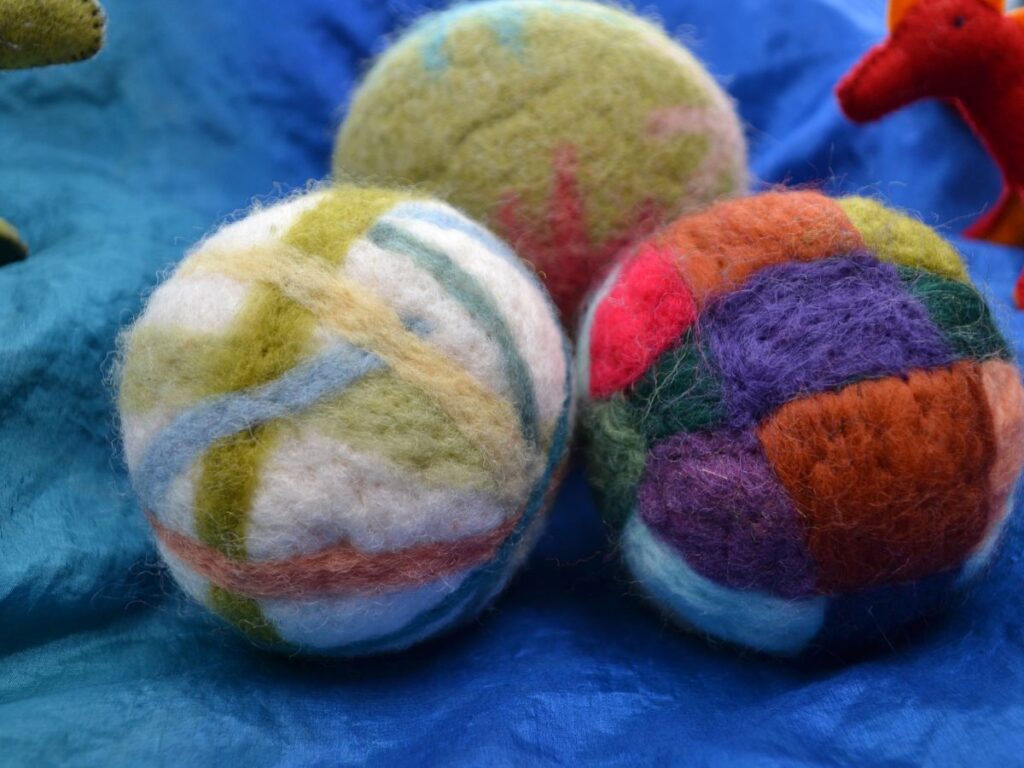
Now you can decorate your ball with different colours.

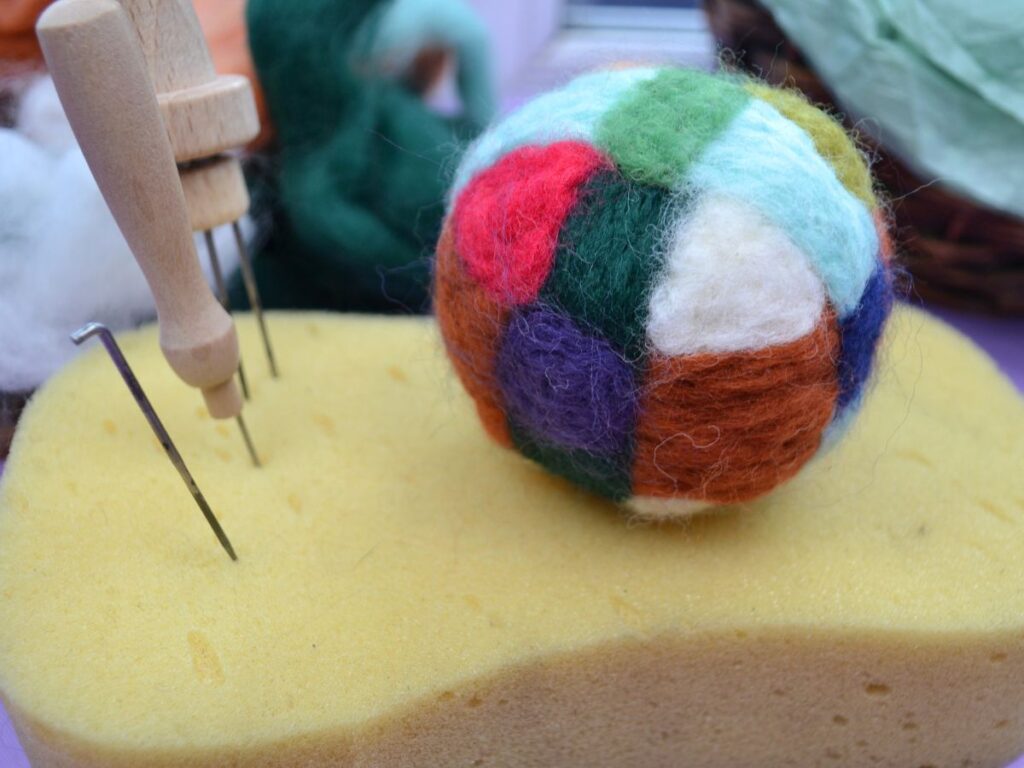
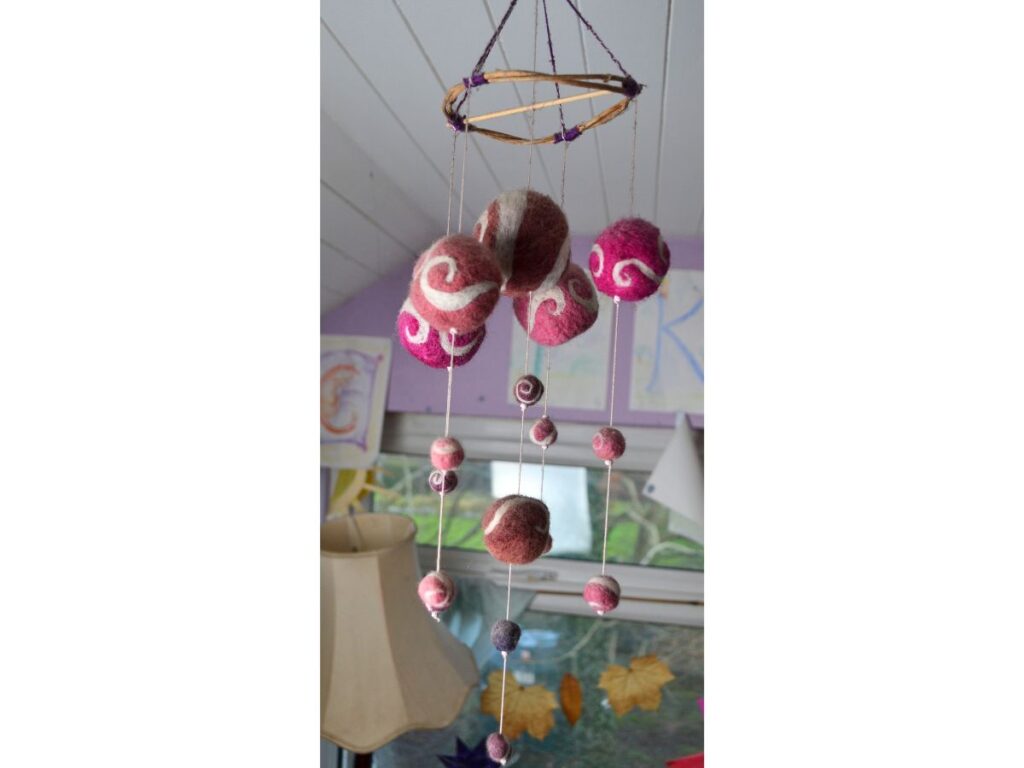
You can make needle felt balls of different sizes and create a beautiful mobile.
I wish you good luck on your needle felting journey!