Easy Christmas tree decorating ideas to make with children
Easy decorating craft ideas for a Christmas tree. The decorating process around Christmas time is such a lovely time for children, so Christmas crafts are a great way of spending memorable, quality time in the Christmas season
Christmas crafts are an enjoyable way of passing the time when the big day seems to be such a long way ahead of us!
I will show you creative ways to make easy Christmas tree crafts and Christmas tree ornaments.
Bringing the Christmas spirit into your home with Christmas decorations.
My favourite Christmas tree decorating ideas to do with my children to bring the holiday spirit to our home are:

- Star, made with sticks and wool, is better suited for older kids to make.
- Clay Christmas shapes are a fun Christmas tree craft for all ages and are great for little hands. Preparing festive decorations is a fun way to spend the cold, wet days of the holiday season.
- Simple wool angels. This is a very simple wool angel, easy enough and much fun for children from around 6 years and up.
- Felt Gnomes. There are more suited for slightly older children, from about 8 years and up.
- Paper snowflakes with a little guidance from a grown-up, any child from 4 and up will enjoy making these.
Where to buy wool?
Star:

You will need:

6 sticks of the same length, I use willow sticks.
Colour carded wool.
Thread
Scissors
How to make it:

With the first three sticks, form a triangle, fastening them with pieces of wool where they overlap.

Repeat with the other three sticks to form a second triangle.

Put the two triangles together to form a star, one pointing north and one pointing south and secure it with thread, where the joints meet. (as shown in the picture)

Finish Star.
Tie a bit of thread at the apex of the star to hang it.
It’s a great star to hang at the top of the tree, or in a window.

You can hang a wool angel under the star 🌟
Clay shapes:

You will need:

- Christmas tree cookie cutters, stars, angels, anything with some festive shapes
- a rolling pin
- Clay.

Make small balls of clay, and flatten them with a rolling pin.

Cut the shapes

With a pointed stick, make a hole for hanging.
Leave them to dry, every few hours, start turning them so they dry evenly
When dry (it could be after a day or two) paint the shapes using golden metallic acrylic paint, or any colour you wish to match the themed tree


Let them dry on a plastic board or similar.
Thread them through the hole and hang them on your tree!
Simple wool angels:
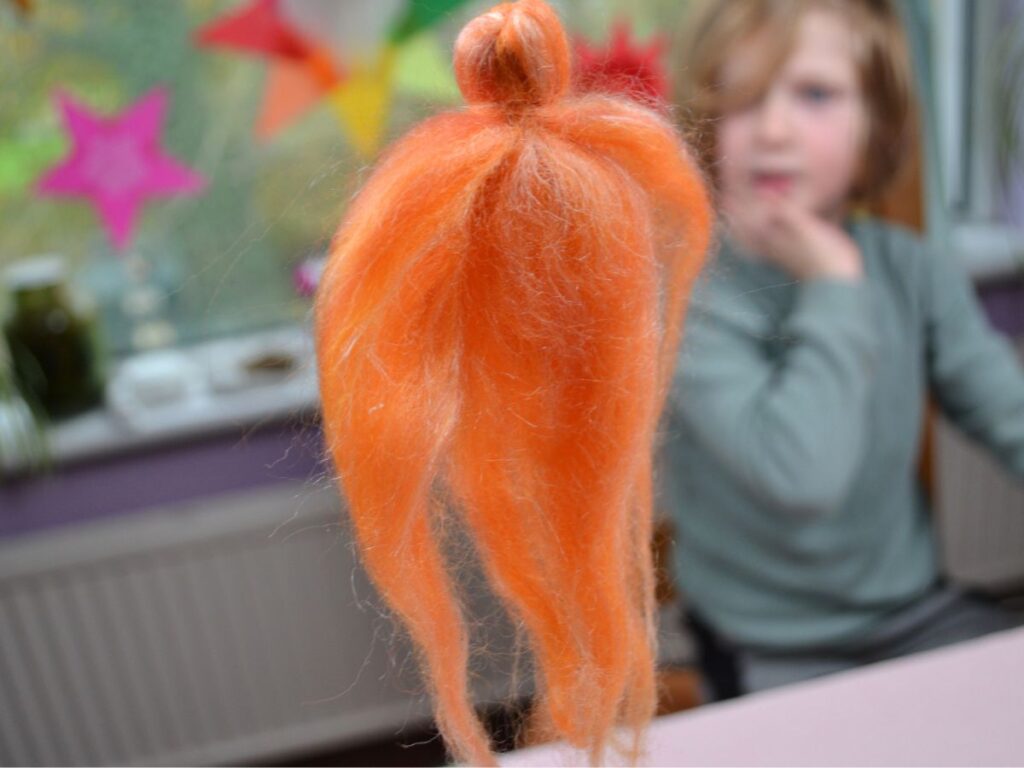
You will need:
- Felting Wool.
- Needle and thread.

Choose a festive look with your felt colours.
Manually pull the wool you need to create the angel’s form.
Make a knot in the middle and tighten.

Once tight, fold the wool in half and spread it around the knot. Take a piece of wool and use it to tie around the knot to form the head.

Do the same with the other colours.

To hang the angel: Open the angel in half from the bottom up, with a double-threaded needle and a knot at the end of the thread, to support the angel. Push all the way up to the head, leaving as much thread as is needed to hang.
Felt Gnomes:


You will need:
- a square piece of felt of about 10×10 centimetres.
- Thread, needle
- scissors
- a little bit of carded wool for the head and filling the body.

Fold the square in half to form a small rectangle.
Cut and L shape from the top right hand corner.
Sew the top with a blanket stitch.

Then sew the right side to close it with a blanket stitch.

With a running stitch, go around the neckline opening, leaving enough thread at the beginning and end.

Make a ball with a little piece of wool, and from under, push it up to the head. Then tighten with the thread to form the head.

Pull a bit wool from the head for the beard.
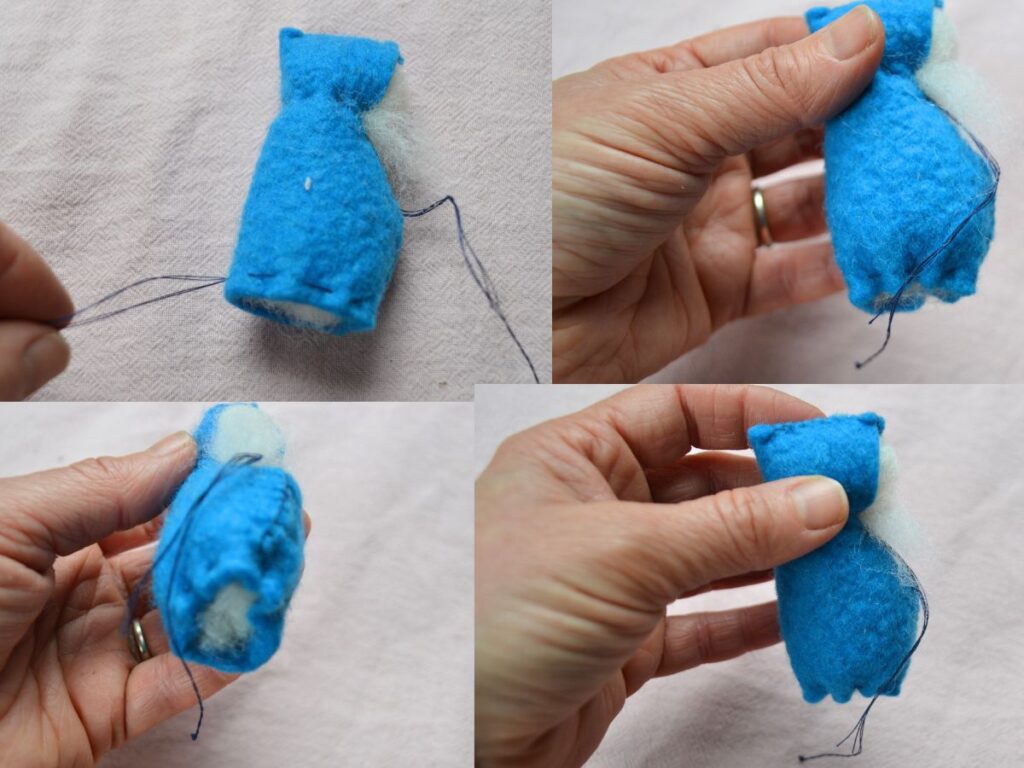
Stuff the body with wool
If you want to use the felt gnome as a With a running stitch, go along the bottom of the gnome and pull the end tight so that the wool does not fall off, but can still stand.

You can tie small bells to the loose thread.

Felt balls:

You will need:

Bright colours, felt wool, warm water in a bowl, a whisk and soap.

Whisk to get lots of foam.

Make a ball with a piece of wool.
Lift just the foam and soak the ball shape piece of wool with the bubbles.

Then, roll the ball between your hands. Apply very gentle pressure until a ball starts to shape, and then, as the felt ball hardens, you can apply more pressure. Keep adding bubbles to your ball as needed.

Let the felt balls dry.

With a long enough embroidery thread or similar, thread it through the felt balls.
Space the felt balls as desired to form a tree collar.

Tie a knot in each end to prevent the felt balls from coming out of the thread.
Paper snowflakes:

You will need:
- Paper, plain white or you can use gold or silver, double-sided paper to add extra sparkle and a more festive look.
- small scissors,
- a pencil.

Paper stars can be made of any size. For this example, I am using 10 x 10 cm.
With a square of paper, fold in half from A to A to form a triangle.
Then fold again from B to B, and a third time from C to C.

Draw a shape on the folded paper, for cutting and cut.
Open up the cut triangle and discover your snowflake.


Cut different shapes

You can cut them in different papers, like metallic or kite paper. And also apply a little bit of papper glue and add some glitter.

Thread a piece of golden thread, to hang on the Christmas tree.