How to Make Waldorf-Inspired Paper Autumn Leaves
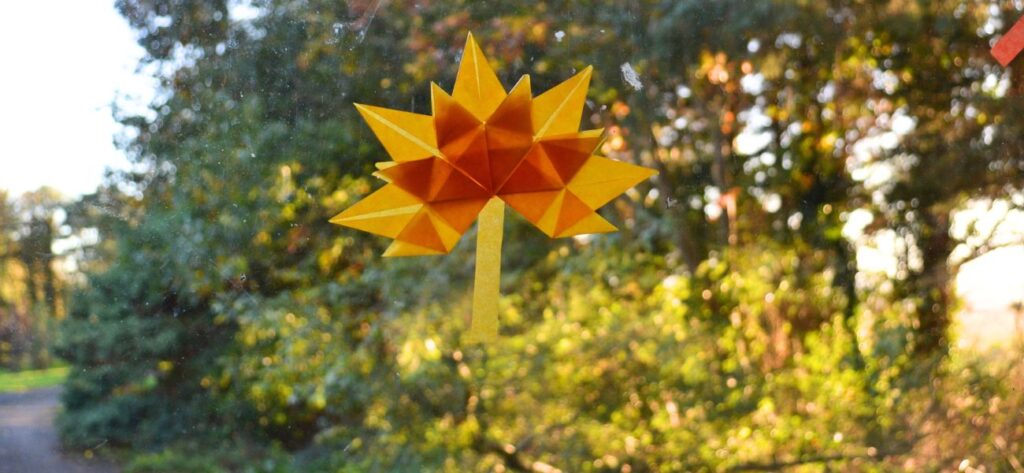
I love bringing a little bit of autumn into our home with simple handmade decorations. As the leaves outside turn beautiful shades of red, orange and gold, it is a lovely time to sit down with my children and make something inspired by nature. These Waldorf-inspired paper autumn leaves are easy to make with colourful kite paper, and they look beautiful hanging in a sunny window, where the light can shine through their warm colours. It is a simple craft that allows us to slow down, enjoy being creative together and bring a little autumn magic into our home. So I invite you to try them.
Materials:
- 6 pieces of Kite paper, 10x 10 cm or smaller.
myriadonline.co.uk has lovely colours that blend beautifully - Glue
- Scissors
How to Make Paper Autumn Leaves
Step 1:
Use 5 square pieces of kite paper for the leaf points, and use the remaining 6th piece for the leaf stick. You can make them in one colour, and they will look beautiful, but you can also mix colours.
To make the first leaf point, take one square piece of kite paper (I am using a 10 cm x 10 cm square) and fold point B to meet point C.
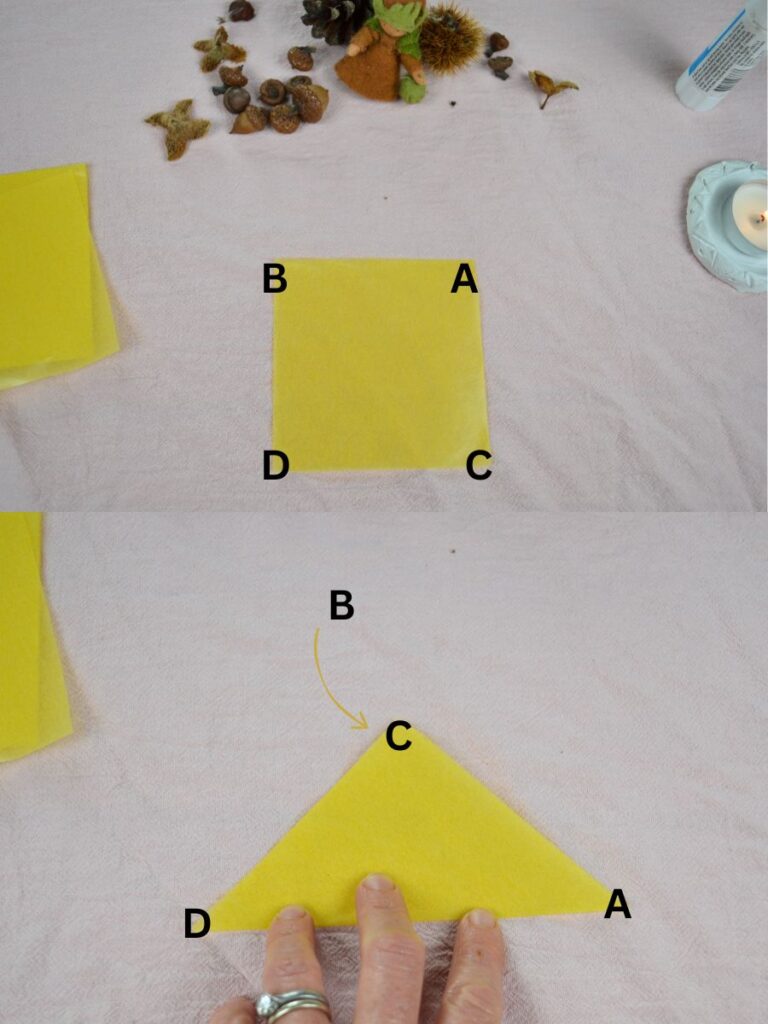
Unfold and fold point B along the diagonal line you just made, then fold point C with the diagonal line.
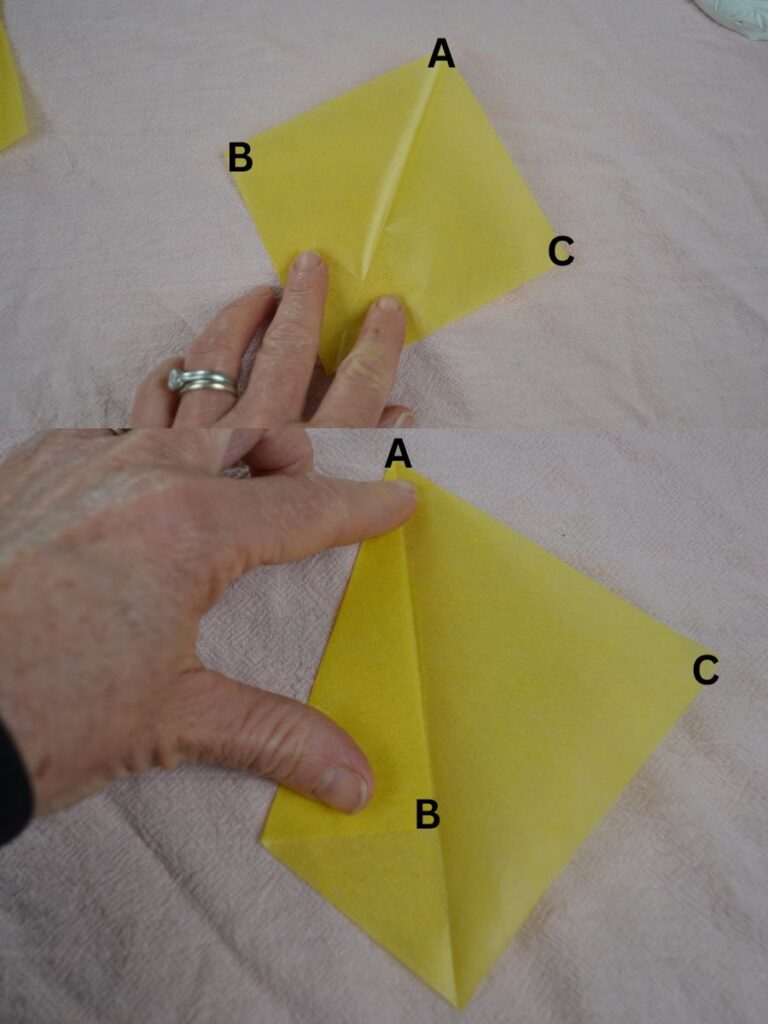
Turn it around, and then fold point D down to the middle crease as shown in the picture.
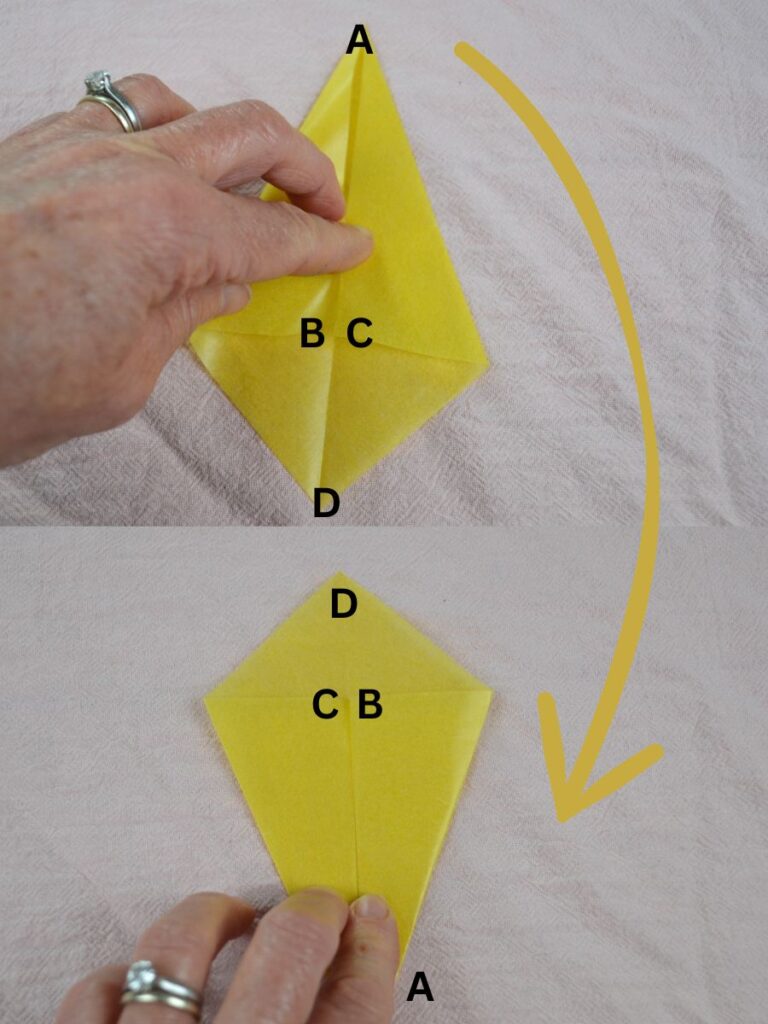
Unfold points C and B so that point D is folded under them.
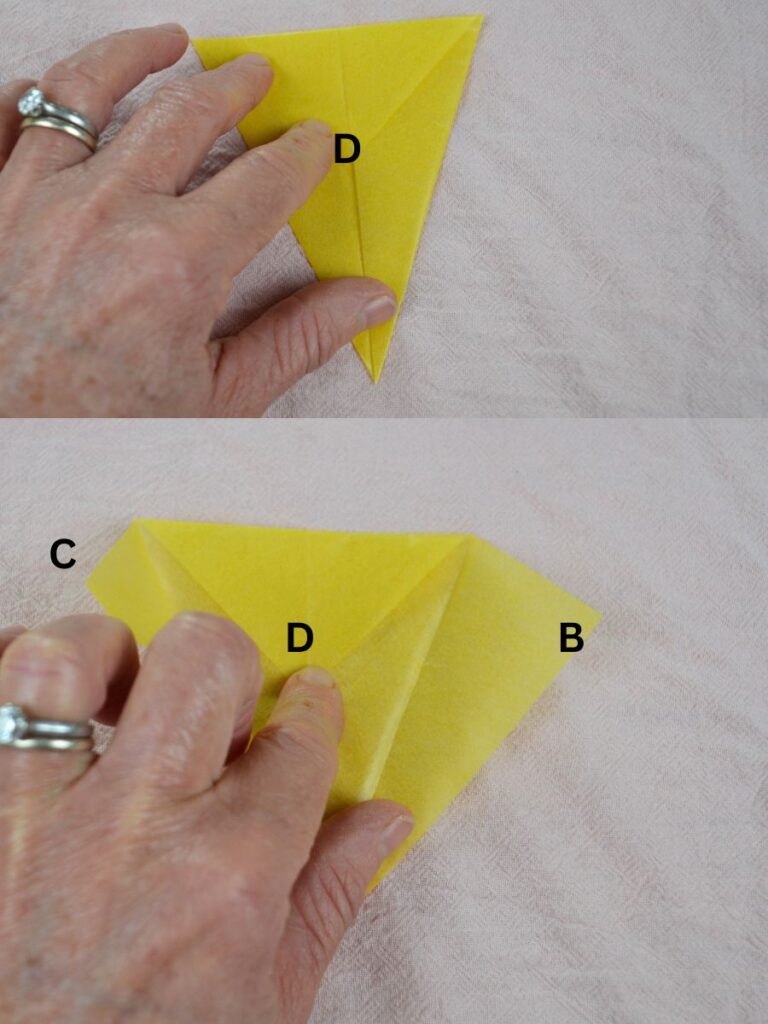
Fold back points C and B to the diagonal line (on top of the folded point D). Now we have two more points: E and F. Now fold points E and F to the middle crease line.
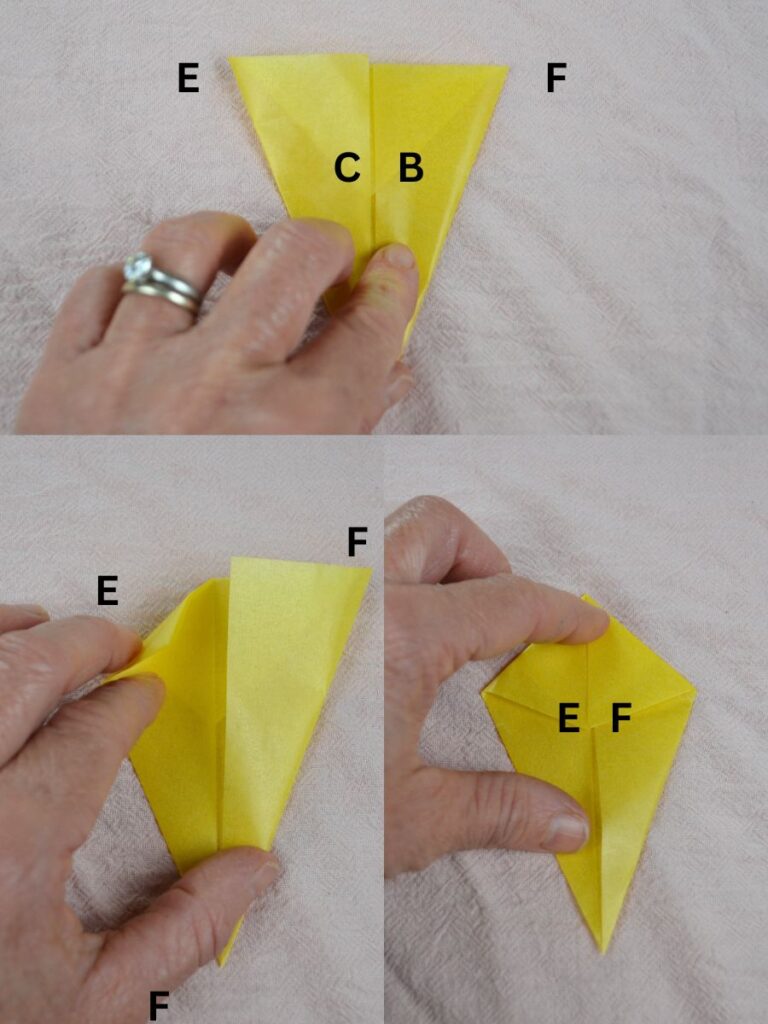
Unfold points E and C. Fold point E back to the crease, then slowly fold the lower part of point C back and gently lift the small triangular flap near the top, making sure it forms a straight triangle. Fold point C to point G, following the creases shown in the picture.
Press the folds flat. Carefully smooth the paper with your fingers, making sure the centre crease and the pointed bottom are neat.
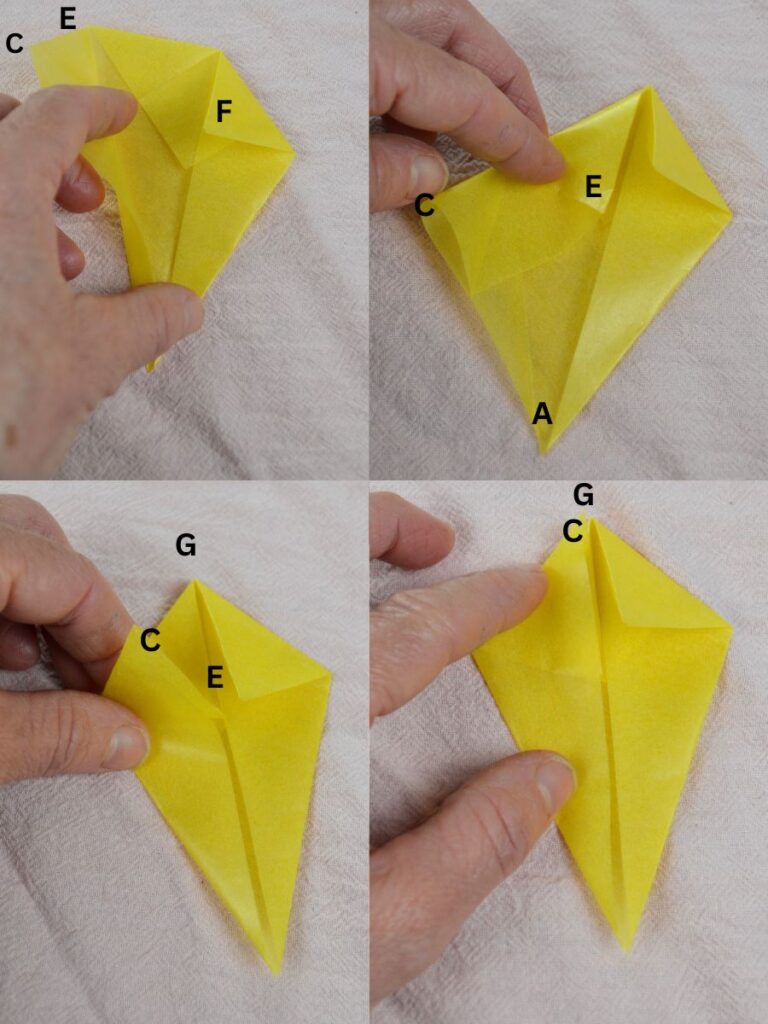
Do the same on the other side.
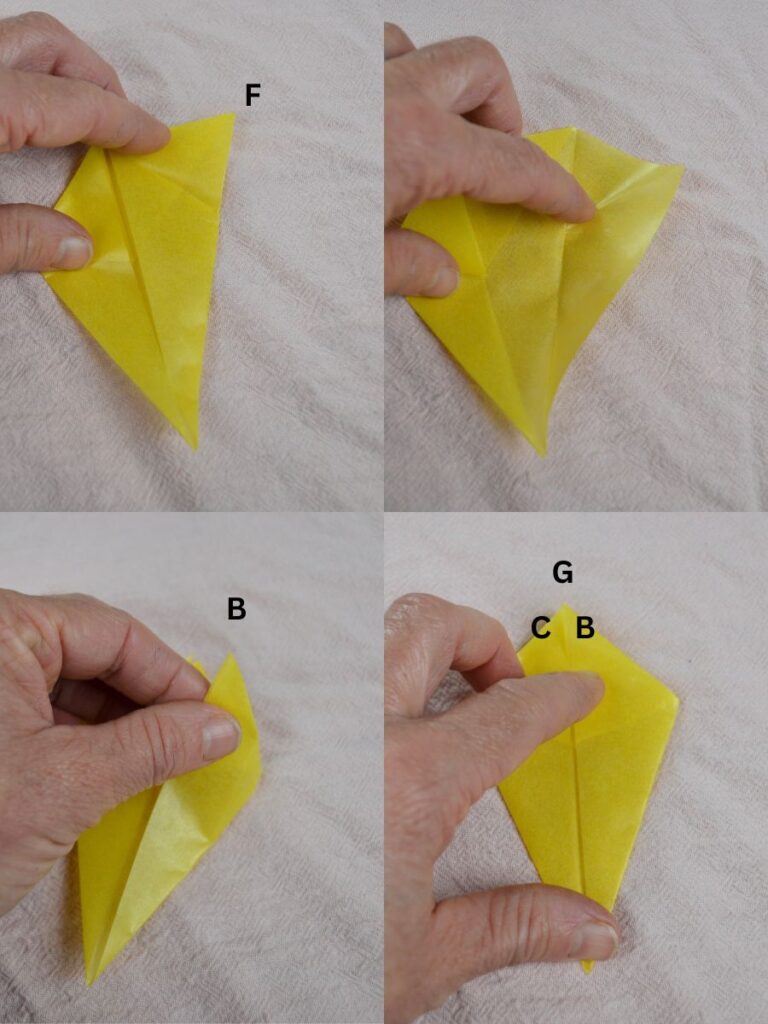
Now fold those flaps down as shown in the picture.

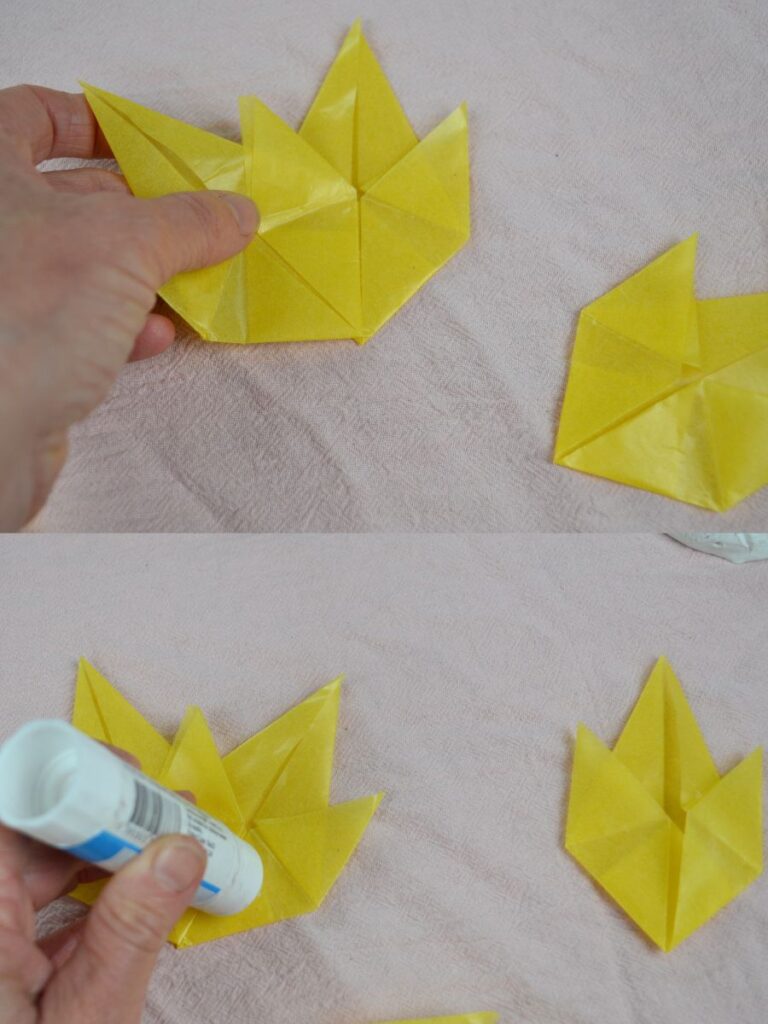
Secure the folds with a spot of glue.
Now that you’ve finished one leaf point, make four more leaf points to have five in total. You can mix colours if you like.

Step 2: Assembling the leave
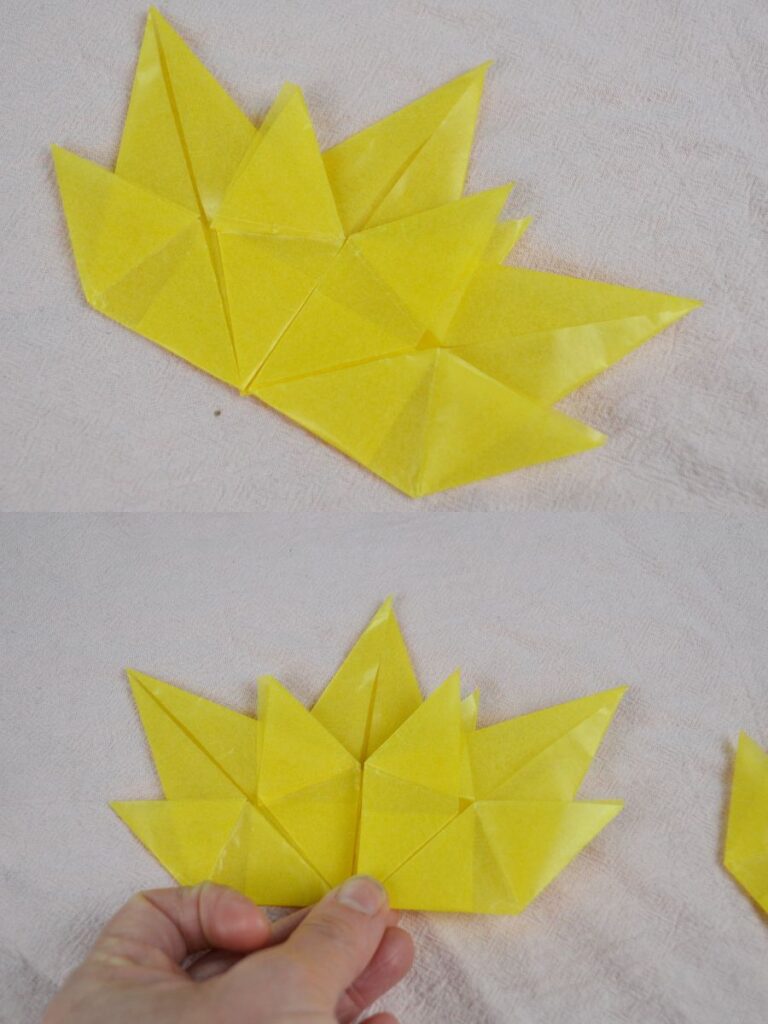
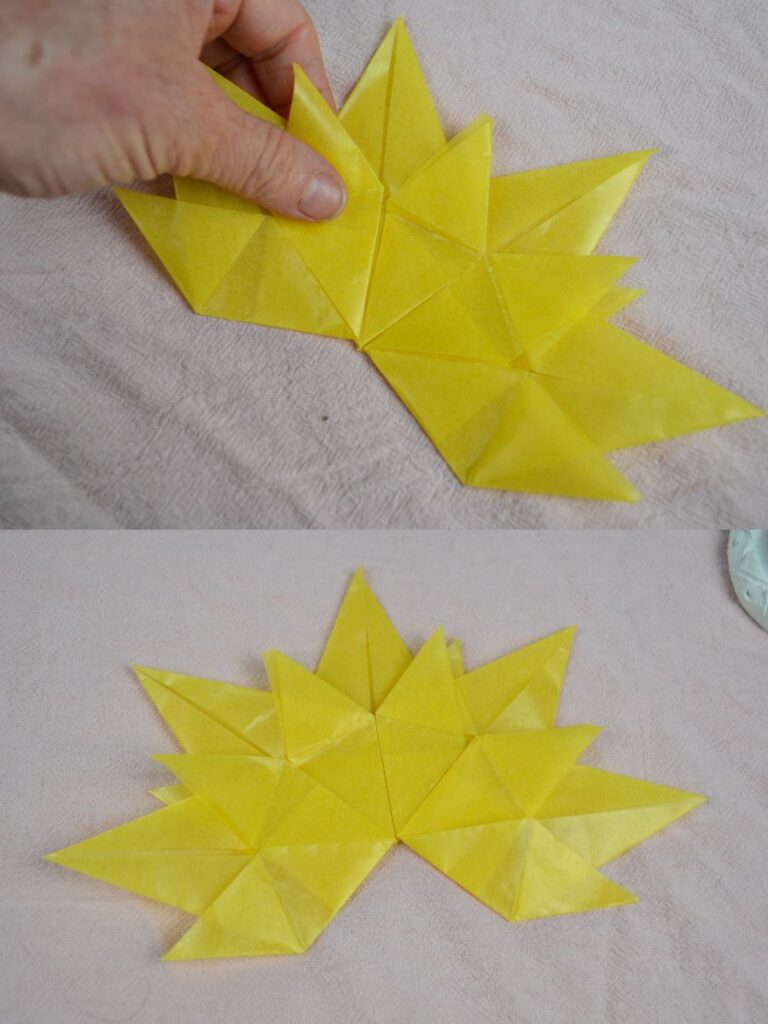
Place one leaf point on top of another, making sure they align with the middle crease.
Continue until you stick all the pieces together.
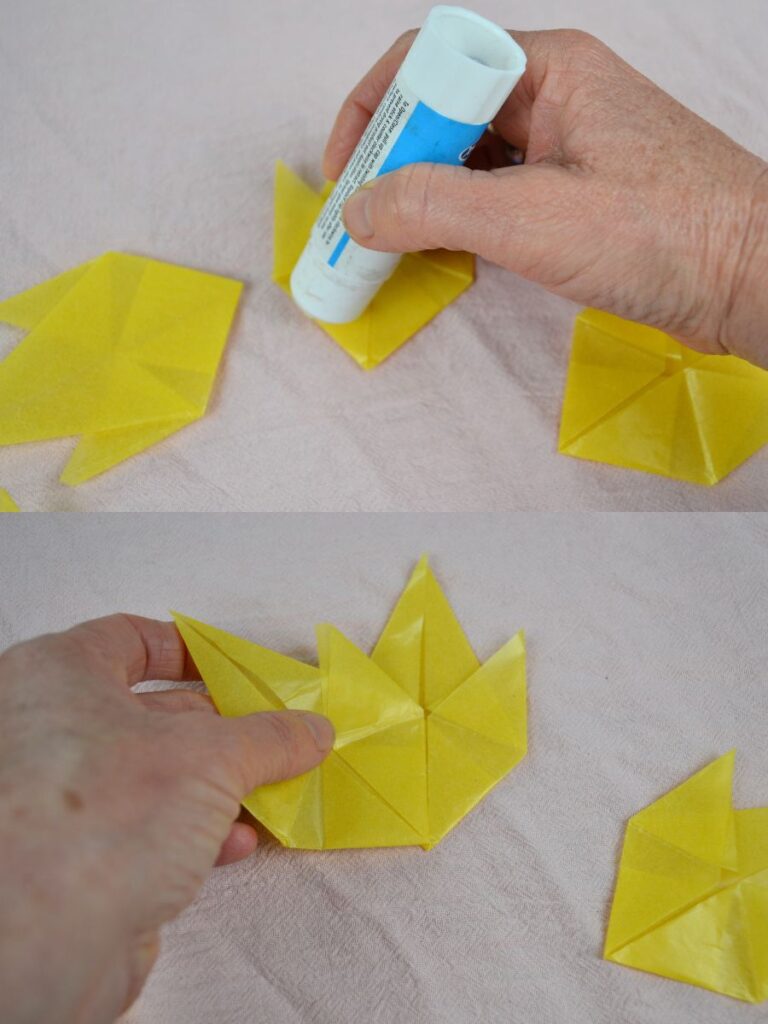
Step 3: Final touches
When it is finished, cut a piece of kite paper to make the leaf’s stick.
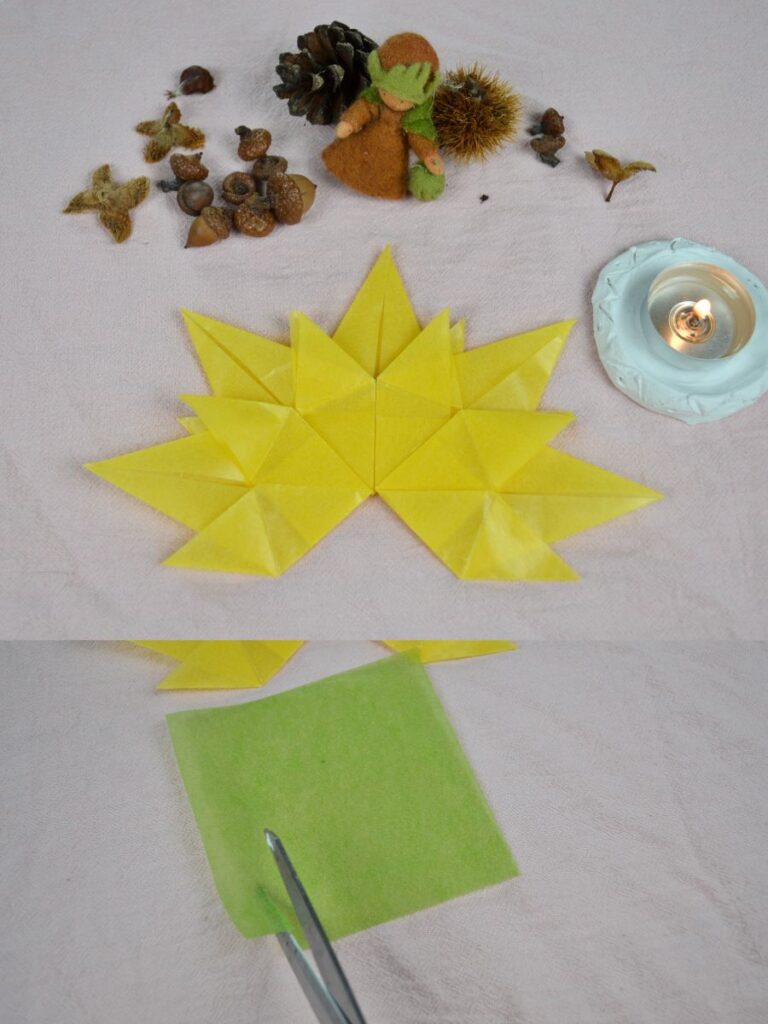
Stick it on the back of the leaf.
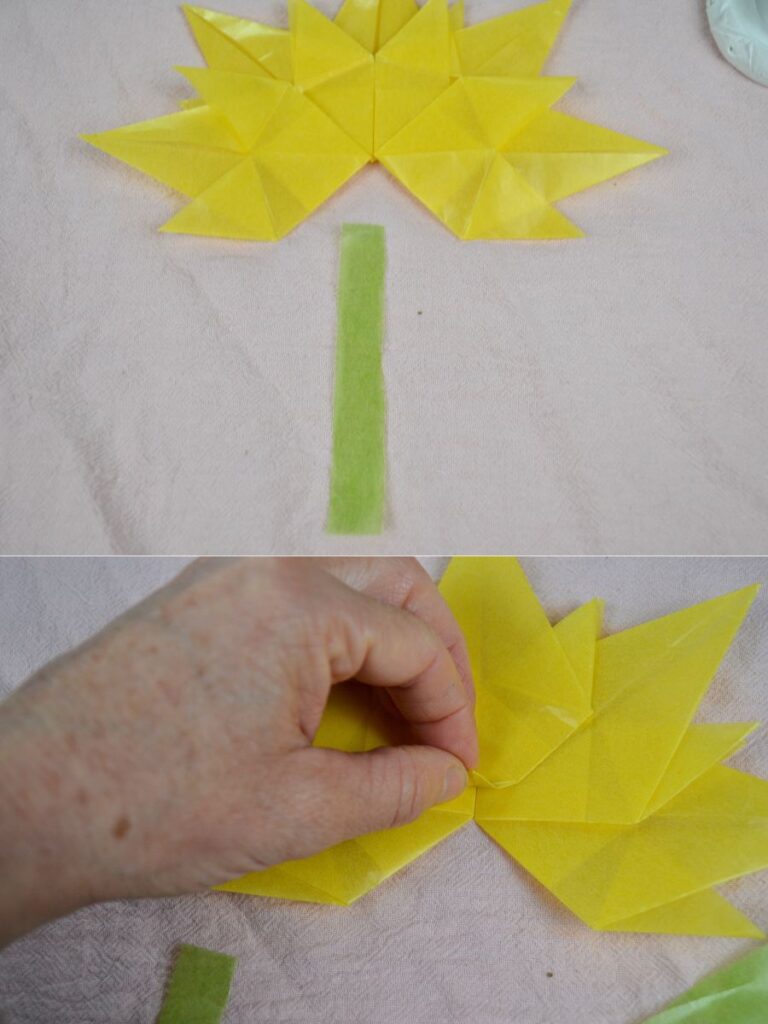
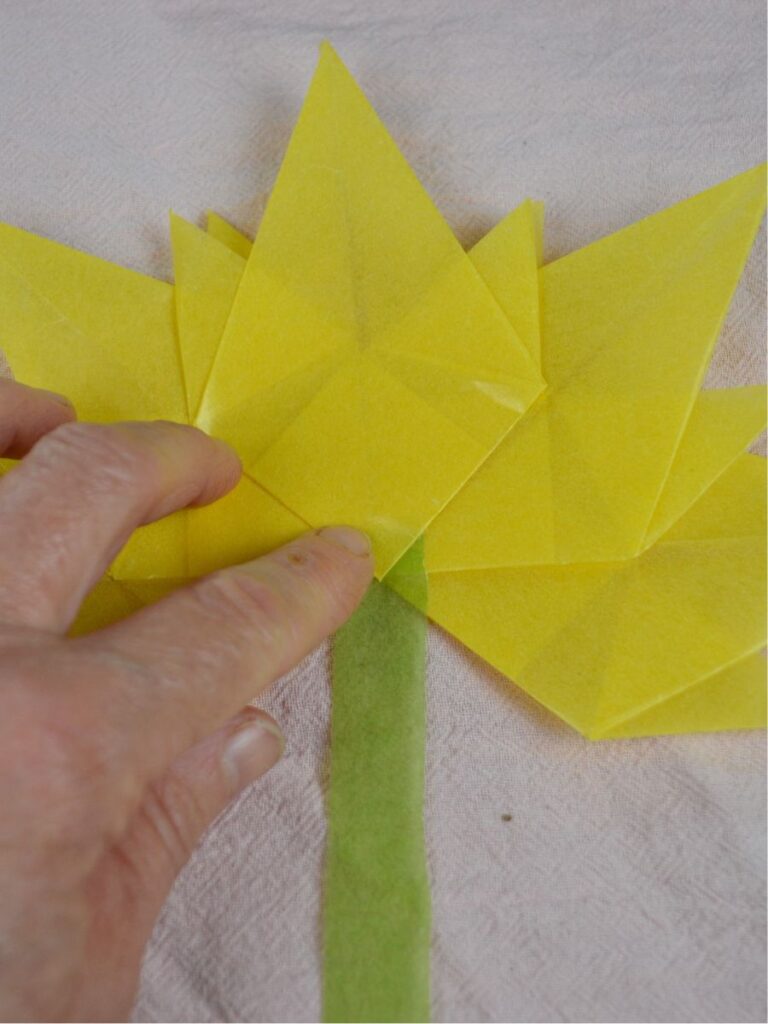
There you have a beautiful paper leaf!
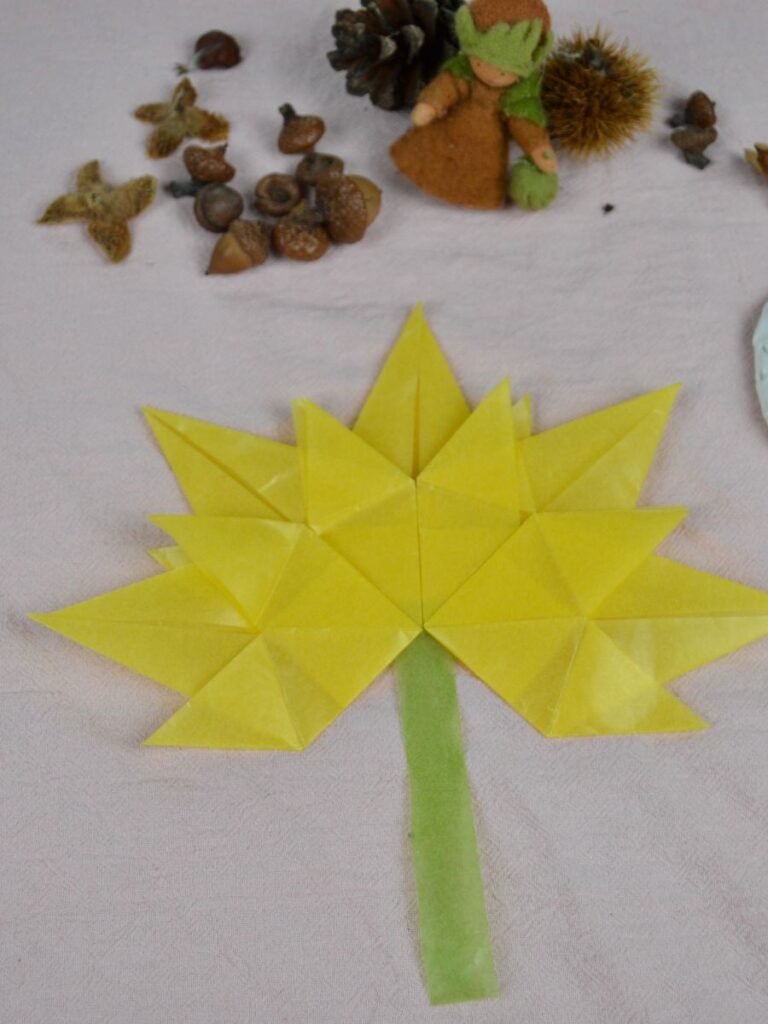
To stick it on a window, add a dab of glue to the back of the leaf, or use small pieces of Blu-Tack at each point.

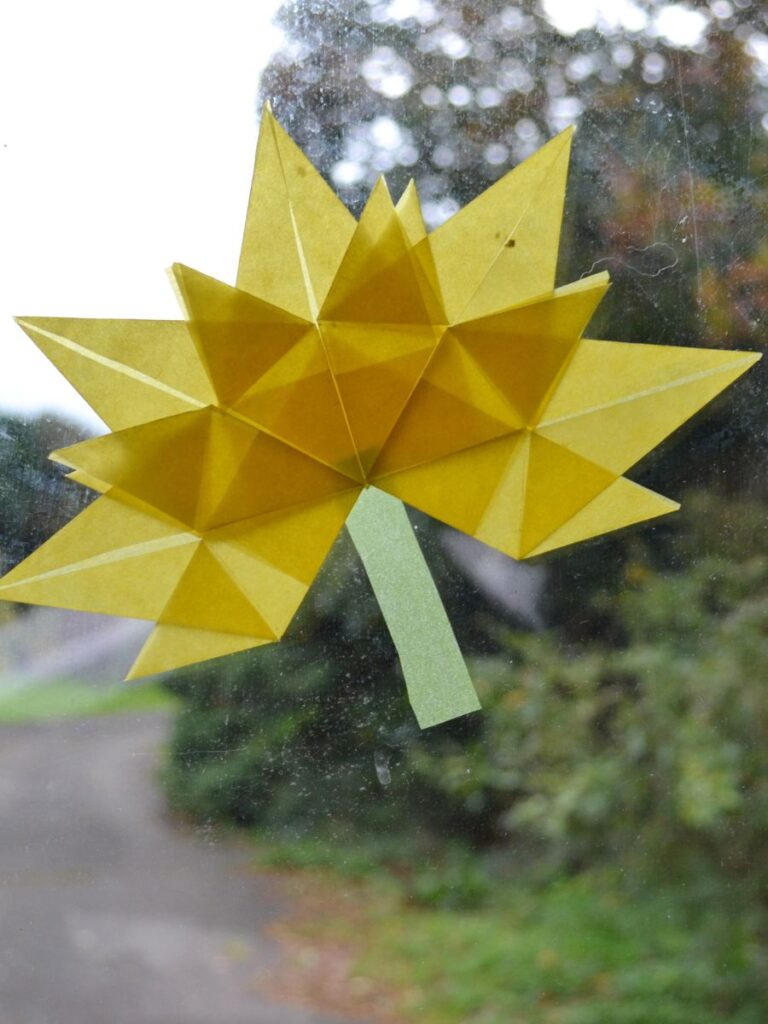

How do you attach paper leaves to a window?
I use roll glue, but you can also use Blu-Tack, which makes them easy to move, though sometimes the Blu-Tack shows.
Tips for Making Paper Autumn Leaves with Children
- Let children choose their own autumn colours.
- Try different combinations of red, orange, yellow and brown.
- Take your time with the folds.
- For a lovely window display, make several leaves in different sizes.