Felt dragon tutorial and free printable pattern


Dragons are mystical creatures that are always a favourite among children.
This is a Felt dragon tutorial, with easy step-by-step instructions for an adorable dragon that comes with a free dragon pattern.
Making felt toys for my children is deeply fulfilling; there is so much that goes into it. Not only is the finished dragon an accomplishment in itself, but all the love and care that went into it is a beautiful example for a child to watch you make it.
Felt:
The best felt you can get is 100% wool. It is slightly more expensive but much nicer and easier to work with, and the finished product will last much longer.
If you are very new to sewing by hand, you can buy cheaper wool to practise, made of rayon, acrylic, wool
Or you can also get felt made of Wool + Viscose – a higher quality than Synthetic felts, more widely available.
Synthetic felt is not recommended for making felt toys.
Stuffing Wool:
For stuffing the felt dragon, Combed Carded wool, undyed. You will need no more than 20 grams of wool for stuffing this dragon.
You can buy it in the world of wool.
Stiches:
Most of the sewing will be done with the blanket stitch
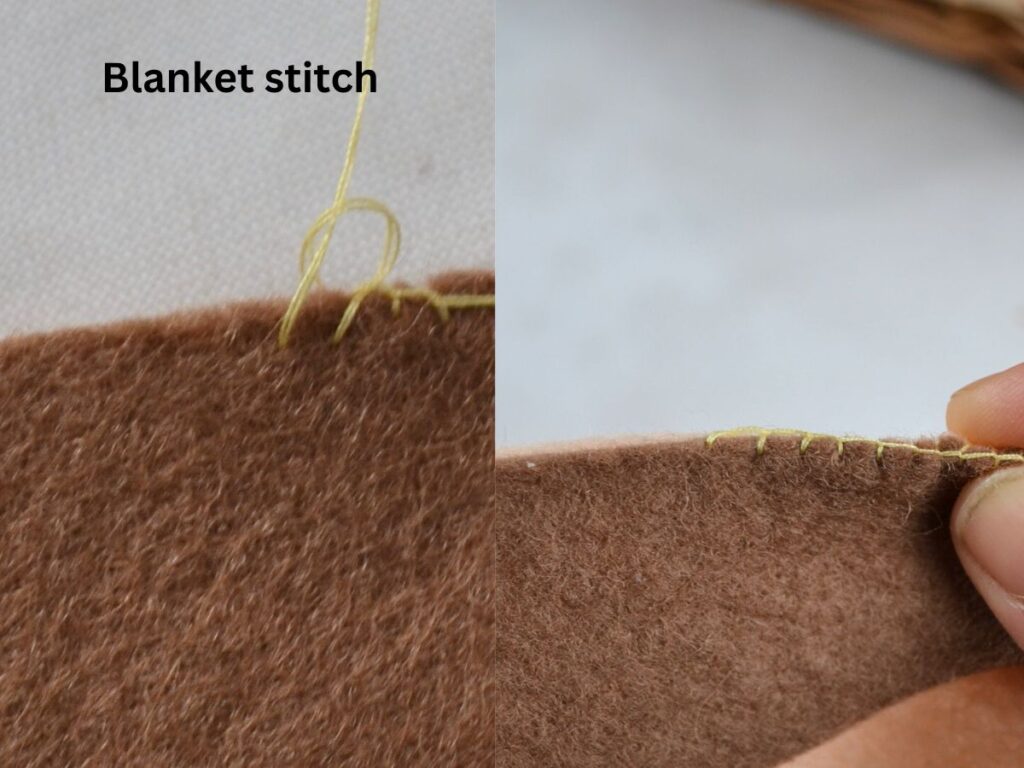
How to do a blanket stitch:
Insert your needle from the underside of the fabric to the front, then push it down through the fabric a short distance away, leaving a loose loop on the surface. Bring the needle back up through the centre of the loop, catching the thread to create a vertical stitch. Continue working these diagonal stitches along the edge, always keeping the working thread beneath the needle before tightening each stitch. Complete the row with a small securing stitch to anchor your work.
.
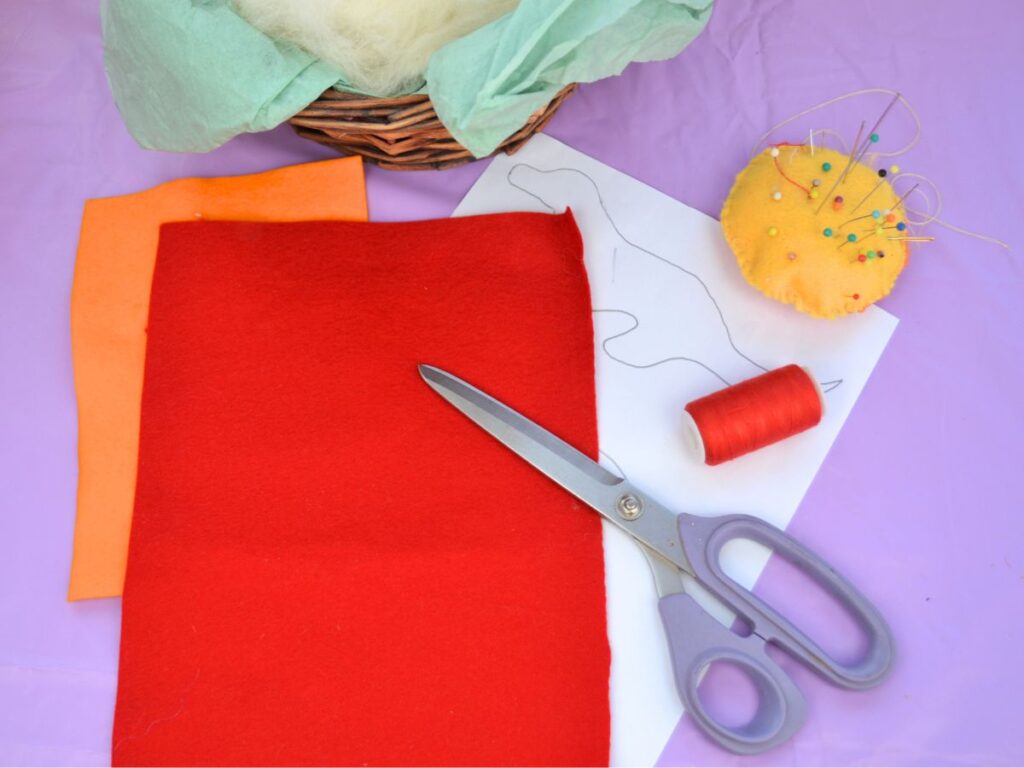
Materials:
- Felt, two colours, any color combination you like.
- Pattern
- Needle and thread of a similar colour to the felt.
- Scissors
Instructions:
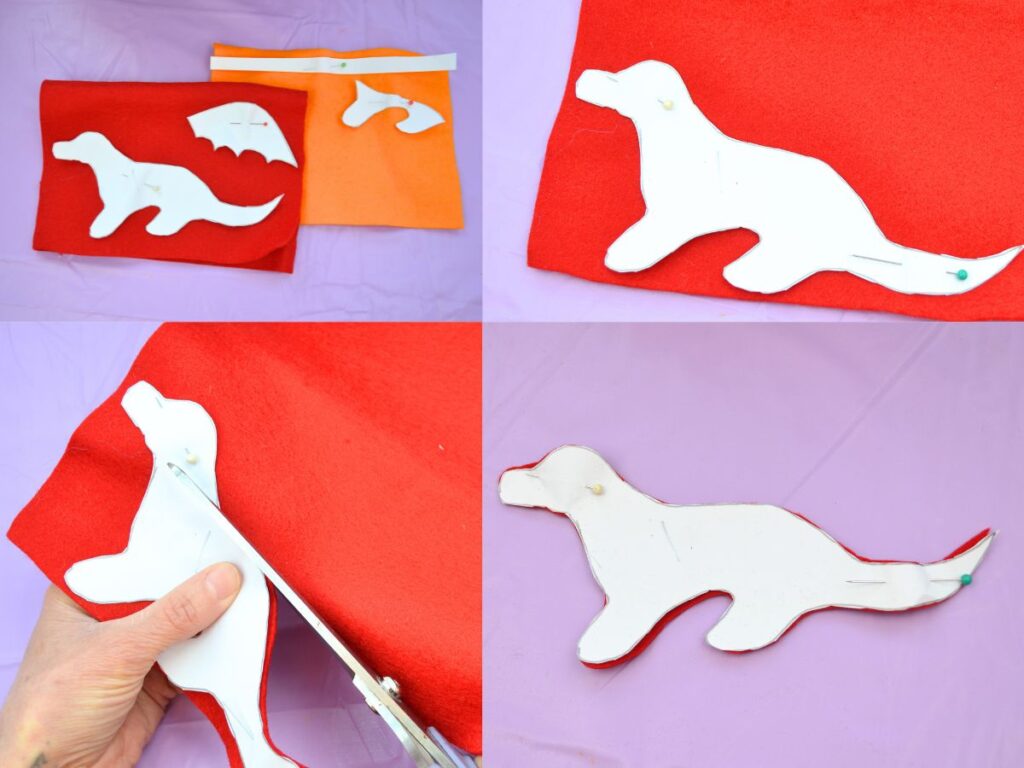
Step 1: Cutting patterns.
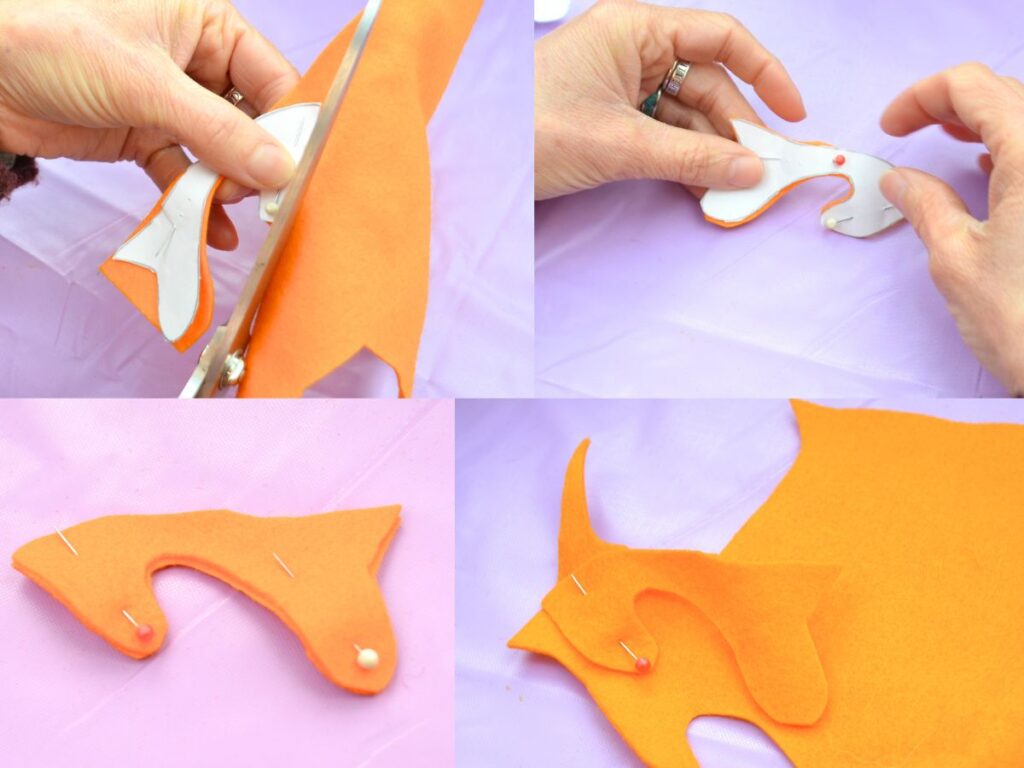
First, cut the pattern pieces. Then fold the A4 felt sheet in half and cut two body and wing pieces simultaneously. Or I like to cut one first, then use it to cut the second piece, wasting less felt.
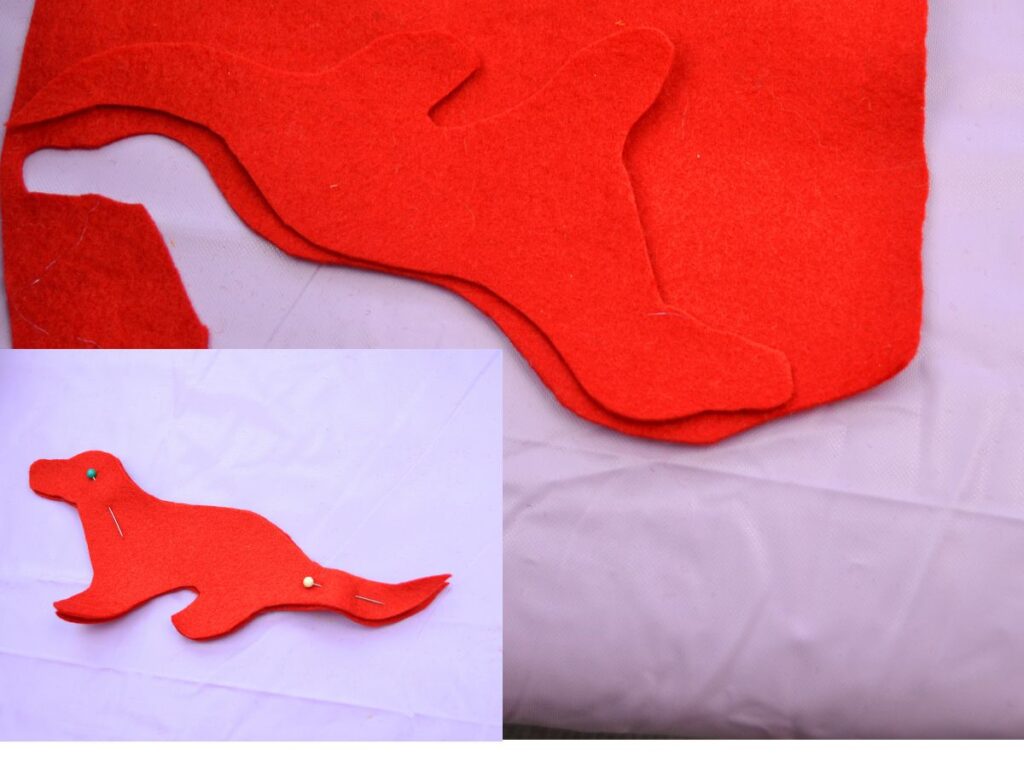
Pin the two body pieces together.

Next step, cut the dragon’s spikes. It is about the width of an A4 sheet, 21 cm.
Cut the spikes as evenly as you can.
Now cut two pieces of the belly with a lighter felt colour. You can do this by folding the felt piece, or, after cutting one piece, use it as a guide to cut the second.
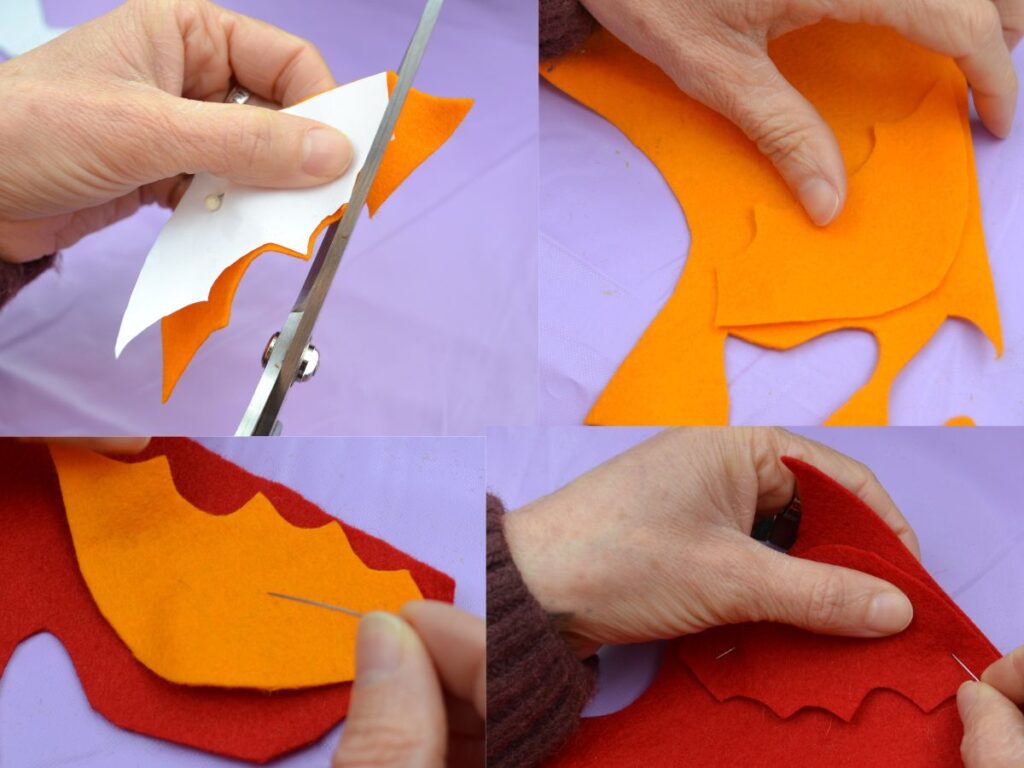
For the wings, cut two pieces of each felt colour.
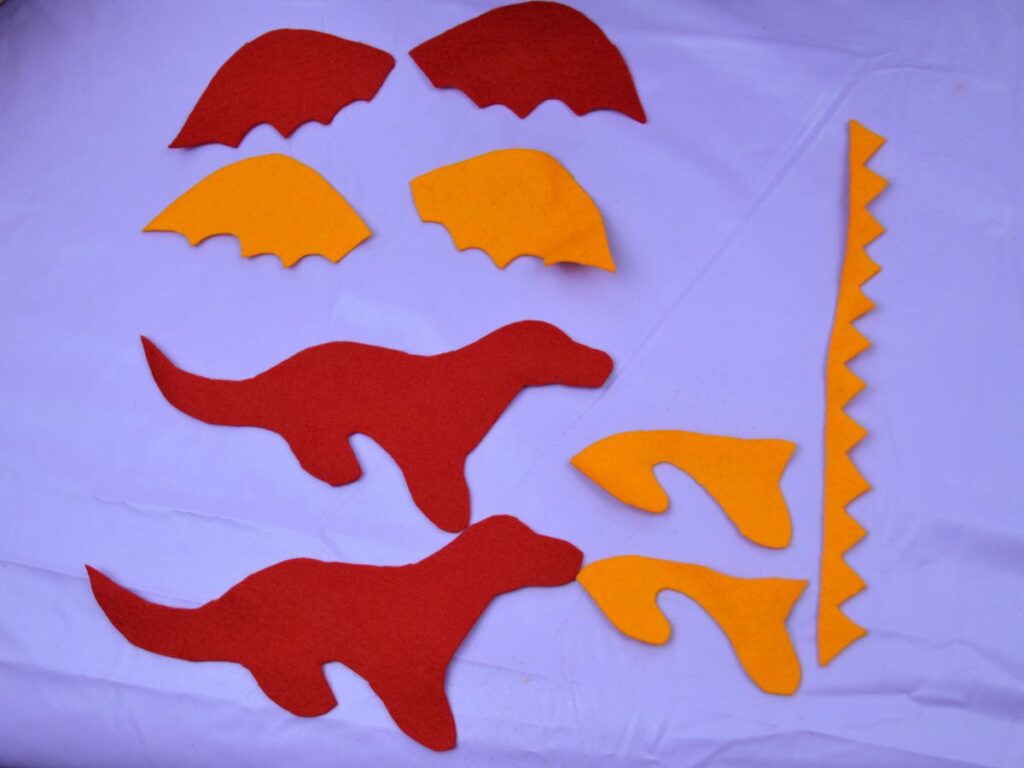
Felt pieces: 2 body piece patterns, two belly pieces of a lighter colour, four wing pieces, two of darker colour and two of lighter colour, and the dragon spikes.

Step 2: sewing
Using a blanket stitch, sew the two belly pieces together on the top, and then place them inside the dragon’s legs.

Once you have the inside aligned with the outer legs, pin all the pieces together.
Start by sewing the front legs together.

If you run out of thread, a tidy way to start a new thread is to stitch it to the last stitch and carry on from there.

Sew the legs and keep going up to the dragon’s head.

When you get to the top of the dragon’s head, insert the spikes.
To achieve tidier finished stitches, go in through the spike and down, with the needle coming out through the body felt; then repeat on the other side. You go in with the needle through the spike and come out on the body felt on the other side.

When you reach the lowest point on the spikes, between each spike, do a blanket stitch. Continue until you finish the tail. If there is any extra spike felt, cut it off.

Step 3: Stuffing.
Make little balls of stuffing wool and start filling the head and legs. They have to feel hard.Then fill the middle part of the dragons body.
Make a few stitches to close the tail, and stuff a bit of wool. Make some more stitches, and stuff more wool until it’s all done. Do the last stitches to close it.

Lose the last stitch somewhere in the body.

Step 4: Wings
Sew the two felt colours of the wing.
Place them in the body, and when the wings are aligned, pin them to keep them in place.

If needed make extra stiches to keep the wings well attached.

If you want, you can make eyes or leave it as it is.

Step 5: eyes
To sew the eyes, sew one stitch from one side to the other, then come back a few millimetres from the last stitch to form the eyes.