How to make easy waldorf window stars with kids

Why make window paper stars?
Window stars are a simple and fun activity to do with kids. It is a relaxing activity the whole family can enjoy year-round.
It is a great way to keep children busy in the winter holiday season, and it can be one of the Christmas crafts you do, to add artistic beauty to your winter windows!
Children ages 6 or 7 and older will likely be able to make their own paper stars, but younger children can participate as well.
Window paper stars are also known as Waldorf window stars. In Waldorf schools, children of all ages do them to decorate their classrooms. Here I will show you how to make your own window stars at home!
Can you make window stars with young children?
The purpose of any activity with your children is to provide an enjoyable experience that stays with them and enriches them. You need to proceed at their pace; you can do a little each day. You can help your child if they want, or just let them do their own thing. The important thing is creating something with your hands and having a nice time!
Young children can help apply a small amount of glue to each pointed star; their small hands are perfect for this task. You or an older child can fold them, and the younger child can glue them together. But of course, sometimes some little ones want to do their own star their way, and that’s ok too!
Having the folds aligned correctly affects the final shape. But all stars look nice when your children make them! Young children imitate everything, so take your time to do it as well as you can, and soon they will be doing a perfect job themselves!
A nice way to help them without interfering is to fix their stars or points at night, when they are sleeping, if they are not finished. Most probably you will not need to explain anything, they won’t realise what you did, but if you do, you can say “the fairies or elves came to help you in the night” (like in the Grimms story THE ELVES AND THE SHOEMAKER)
I hope you enjoy making them as much as we do!
Materials you need:
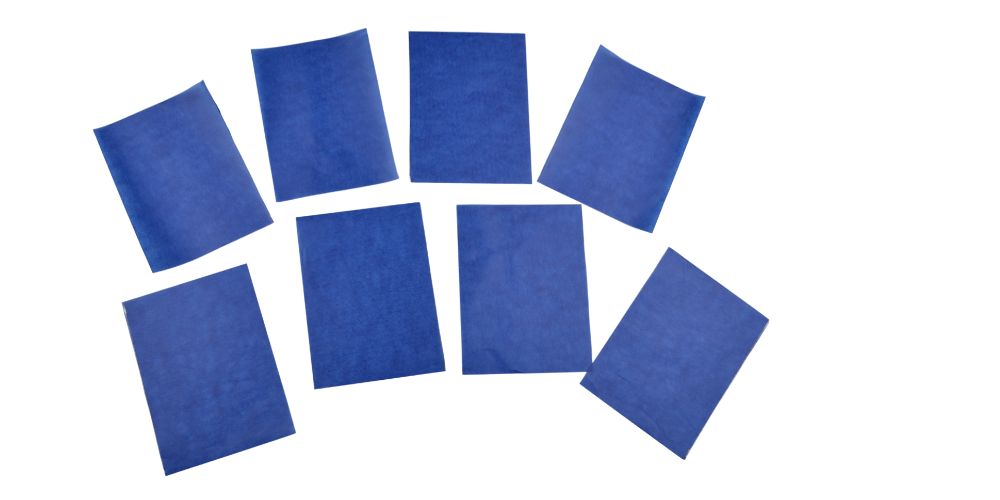
- Squares sheets of kite paper (Kite paper is a translucent paper similar to tissue paper, but kite paper is a stronger wax paper)
- You can get 10x10cm or 14cm Kite paper here https://amzn.to/3Ek7SZX
- A glue stick
- Double sided tape (optional)
- Ruler
- Pencil
- Scissors
You can use any colour you like or a mix of colours. Rainbow stars are really beautiful.
Tissue paper works too, but it is more difficult to manage.
The following are simple stars, some of them with square paper and some others with rectangular paper.
For the rectangular pieces, just take a piece off the square piece to get a rectangular shape.
Using SQUARES shape pieces of kite paper
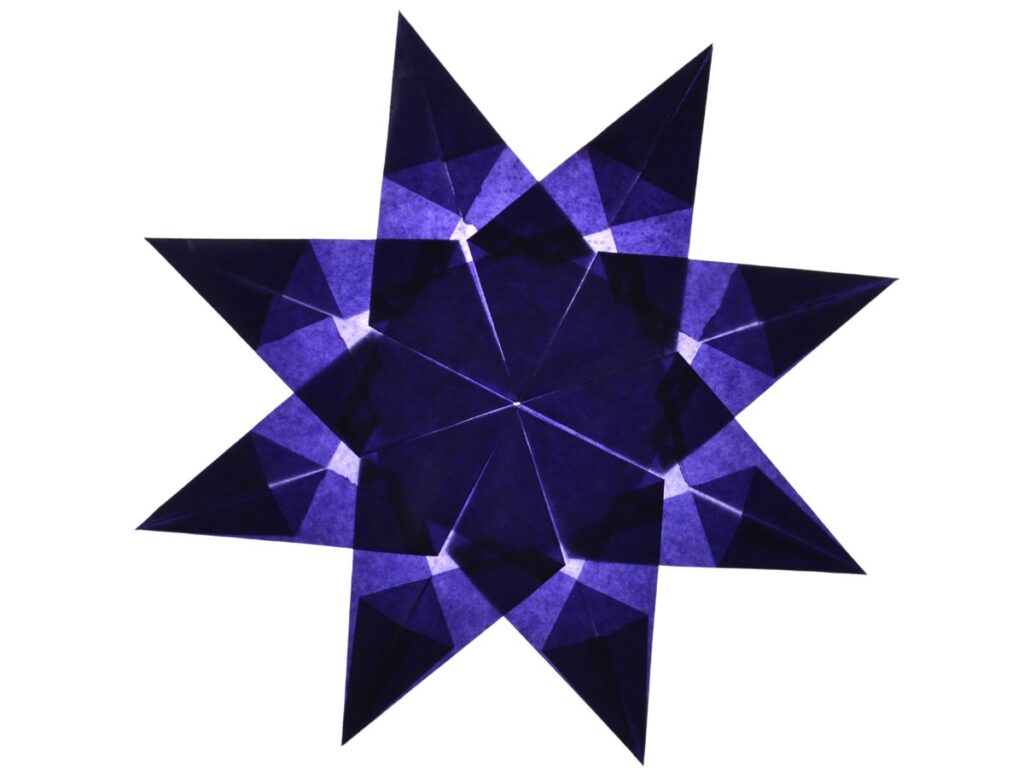
8-pointed star
This is a straightforward star to make.
You need to have eight squares of kite paper (10×10 or 14cmx14cm) in the colours you choose.

Step 1:
Start by folding the sheet point to point in a diagonal as shown in the picture to create a crease.
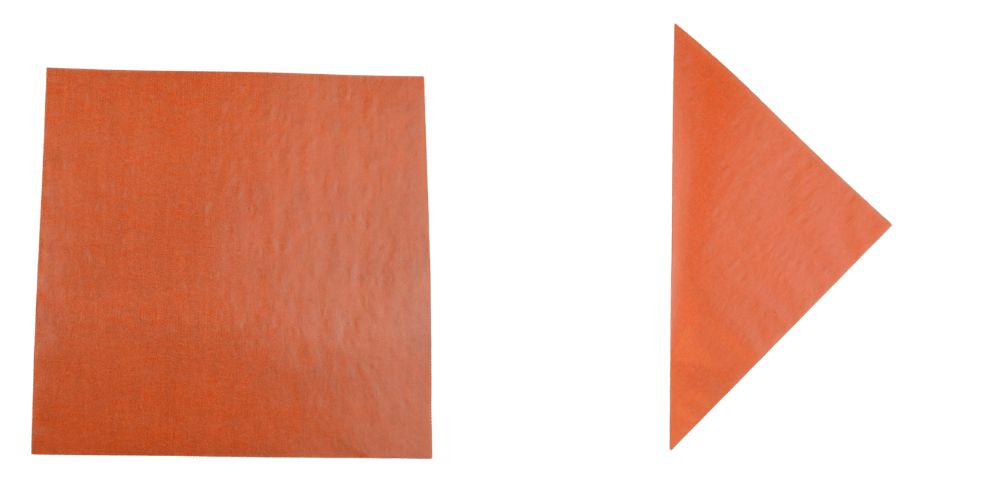
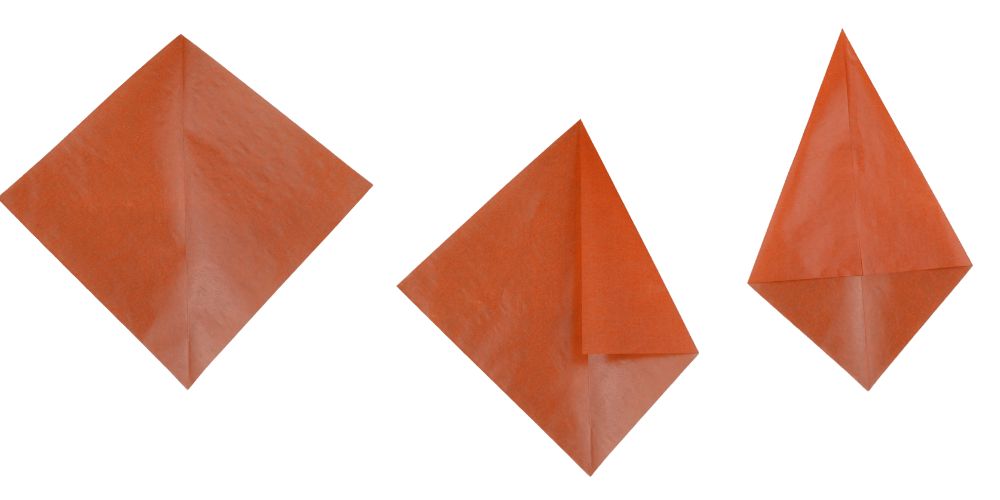
Step 2:
Now open the square up and fold one side to the centre crease, and then the other side to form a point star.
Step 3:
Apply a small dab of glue to keep them in place.


Step 4:
Do steps 1, 2 and 3 with the rest of the squares.

Step 5:
Glue the first and the second square so they overlap at the centre crease, then the second square to the third and so on.
Now it is ready to stick it to a window!

5-pointed star:
You will need:
5 squares of kite paper


Step 1
Follow the steps 1, 2 and 3 as the 8-pointed star, but only make 5-pointed shapes.
Step 4:
When you glue them together, instead of overlapping at the centre crease, stick the unfolded base of the second star point just a little bit over the first one, about 10 mm, as shown in the picture.

A finish 5 point star!
10-pointed star
You will need:
10 squares of kite paper.
Follow the steps 1, 2, 3 and 4 as the 5-pointed star, but make two 5-pointed stars.
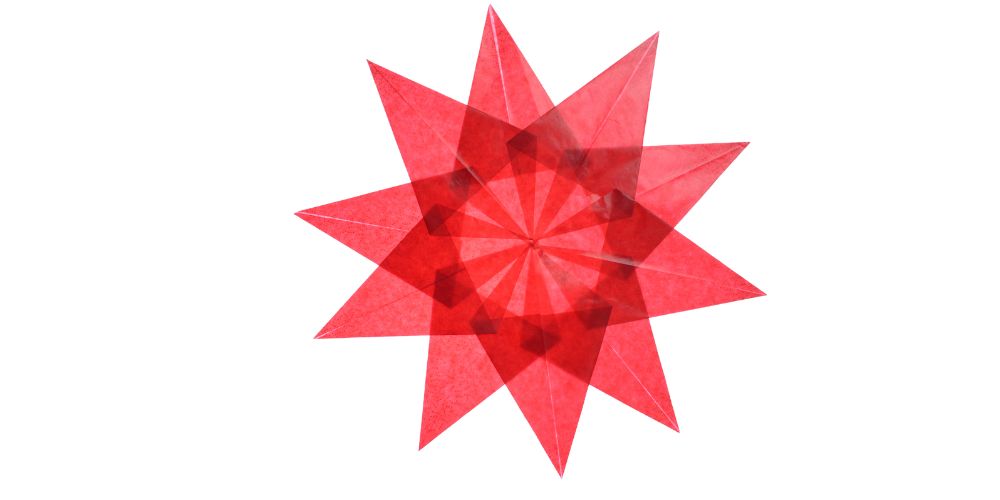

When you glue them together, stick the unfolded base of the second 5-pointed star a little bit over the diagonal of the first, as shown in the picture.
The finished 10-pointed star!
Using RECTANGULAR shape pieces of kite paper
8-pointed star
You will need 8 10×10 cm square sheets of kite paper
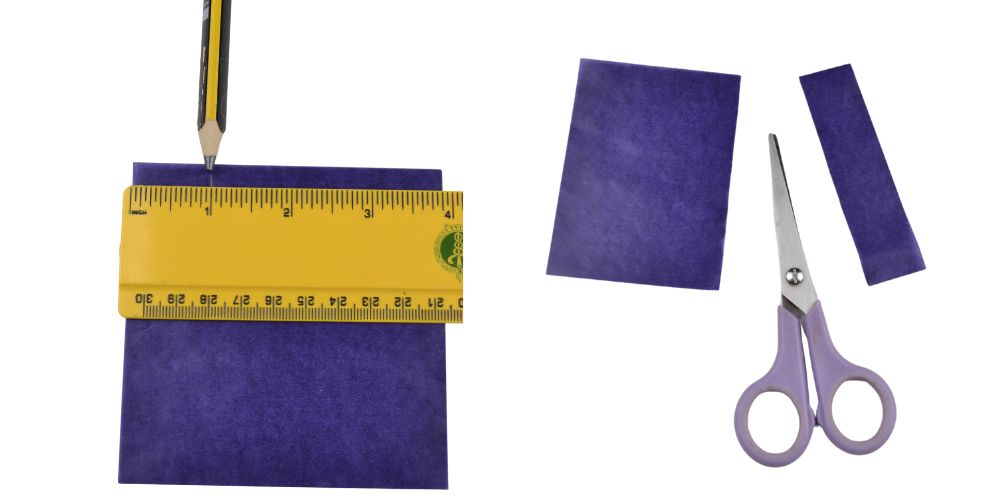
Take one square sheet of kite paper and take 2,5cm off and cut it off to have a rectangular sheet.
You can give the leftover piece of kite paper to your youngest child to make their own star! (whatever way they want!)
Step 1:
First, fold it to the centre point of the sheet, longways up to form a crease and then unfold.
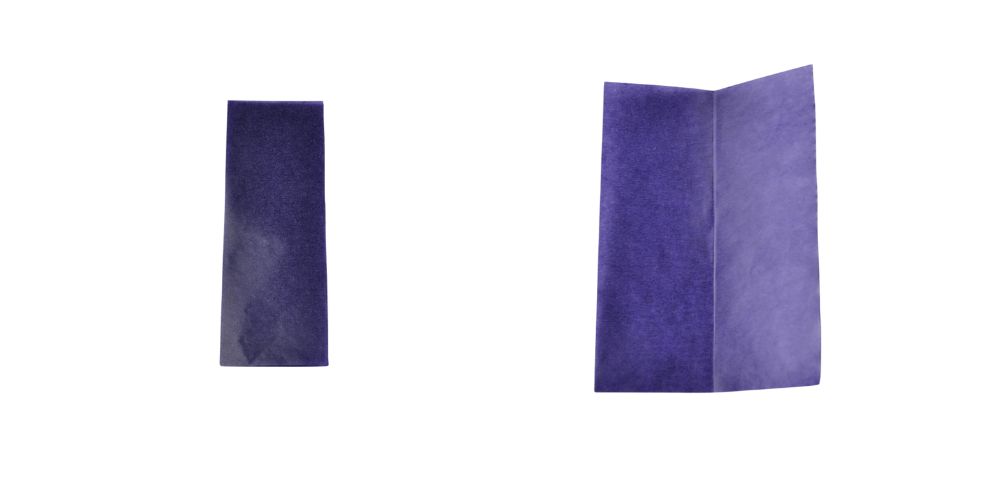

Step 2:
Fold one corner to the centre crease, then fold the remaining corners as shown in the picture.
Step 3:
Once more fold the top star points to the centre line as shown in this picture


Step 4:
Put a bit of glue to keep them in place.

Step 5:
Make the eight sheets this way, and then stick the window star together.
Step 6:
Stick the unfolded side of the first star point to the second and continue until all the remaining pieces are glued together.


Finish 8 point star
16-pointed star:


You will need:
16 rectangular pieces of kite paper.
Glue

For this 16-pointed star, first follow the same instructions as the 8-pointed star above, and make one finish 8-point star. Then follow the instructions below.

When you have an 8-pointed star completed, stick one star point halfway between each of the 8 points star, as shown in the picture.
Finish 16 point star!
How to stick the stars to a window?
You can use glue dots in each point star, or double-sided tape or a little ball of blue tac in each star point.
Stick it to a window that has direct sunlight (east or west) for these beautiful stars to glow!
If you have a window near your nature table, that is a lovely place to stick them to!
How long do they last?
Paper window stars last a long time, but how long they last depends on how much sunlight they get before the colours begin to fade and the quality of the paper you use.
Tissue paper window stars will last much less time; the colours fade much quicker than the kite paper window stars.
The Christmas window stars, we put them away after Christmas. The White winter ones, we put them away when spring comes! And the colourful ones we leave all year round! and add new ones in springtime!